tech Reviews
GOverlay Plus 7.8-Inch Review: The Little Screen That Brought My Gaming Setup Together
I tried the GOverlay Plus 7.8-inch on my gaming desk and beside my home server. Here’s why its custom profiles and flexible software won me over.
By worththecart
•
•
5 min read


I spend a lot of time around gaming setups and tech that promises to make a desk look better. Some of it looks great in a photo, but once the novelty wears off, you realize it doesn’t have much of a job to do. That’s what made me curious about the GOverlay Plus. I liked the idea of a small display I could make my own, but I also wanted it to be useful after I’d finished taking pictures of it.
The moment it really clicked for me was when I put a Blade Runner background on the GOverlay Plus to match my two PC monitors. My desk already had its own look, but the little screen made the whole thing feel more connected. It was a small change, and I kept looking over at it anyway.
That’s a big part of the appeal here. The GOverlay Plus can be a finishing touch for your setup, but it doesn’t have to spend its life showing a wallpaper. It can display information you actually want to see, and you can change its layout when you want something different. After spending time setting it up and exploring the software, I think it’s one of the more interesting accessories I’ve added to my desk.
GOverlay provided the unit for this review. The photos and opinions in this article are my own.
What is the GOverlay Plus?
The GOverlay Plus 7.8-inch is a small, wide display built for custom dashboards, backgrounds, widgets and information. It has a 1280 × 400 IPS screen, connects over Wi-Fi and gets its power through USB-C.
Think of it as a dedicated place for the things you’d like to keep visible while you use your computer. That could be PC temperatures and usage, the weather, a design that matches your setup, or a profile made for a particular game. It isn’t a regular HDMI monitor, so you can’t drag a browser window from your main screen onto it. GOverlay Plus has its own display and profiles, which you manage through GOverlay’s software and web portal.
I think that makes more sense for a desk like mine than squeezing another conventional monitor into the space. My main screens already do the work I need them to do. I wanted something smaller that could sit nearby, look good and show a few things at a glance.

Its wide shape helps with that. In the photo above, you can see it on the desk without the carefully matched wallpapers from the main image. Even in a simpler setup, it has a nice presence. It draws your eye when you want to check it, but it doesn’t demand the space or attention of another full-size monitor.'
Opening the box
I photographed the GOverlay Plus both before and after opening it. The box shot is a useful starting point, but the picture of everything laid out on the table gives a much better idea of what you’re getting. It’s also a nice contrast with the finished Blade Runner setup: this is what the display looks like before you’ve made it yours.
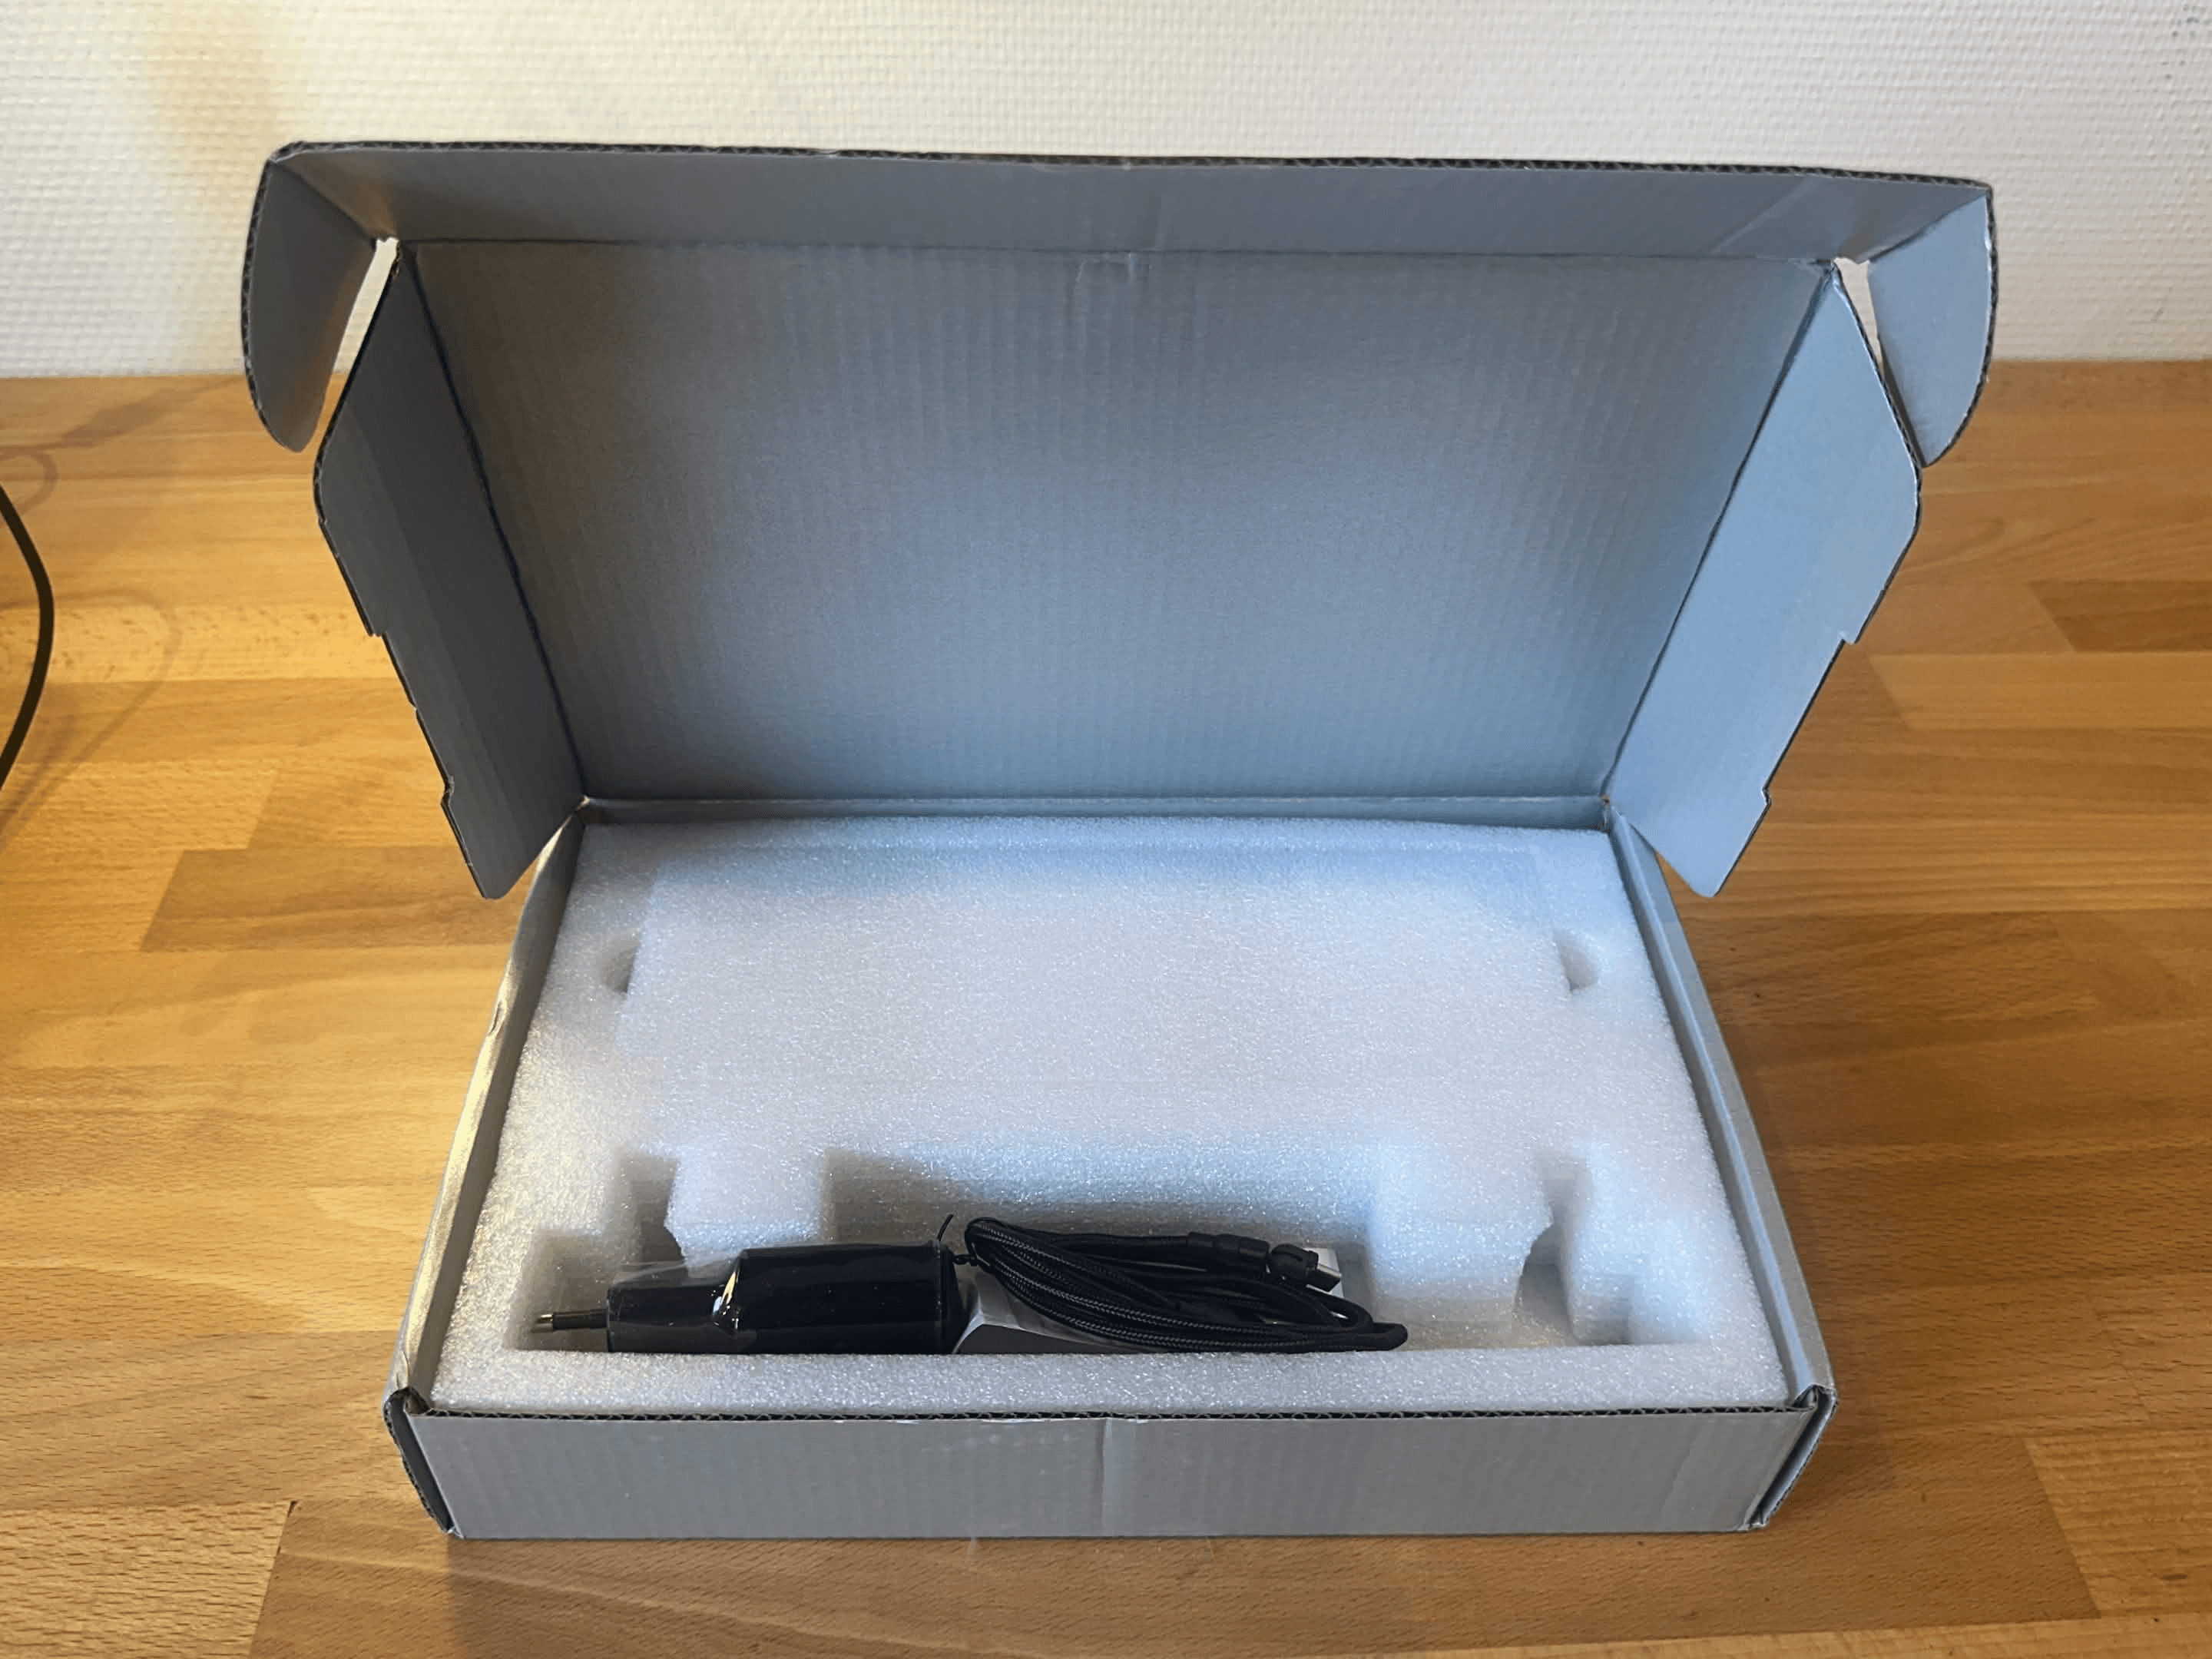
One thing I appreciate about this kind of product is that you can decide where it belongs. You might put it beside a monitor, under one, or somewhere else on the desk where you can glance at it. I started by seeing how it looked with my PC setup, but I can also picture it beside a server or other gear where a status display would be genuinely handy. I’ll show that side of my setup later in the review.
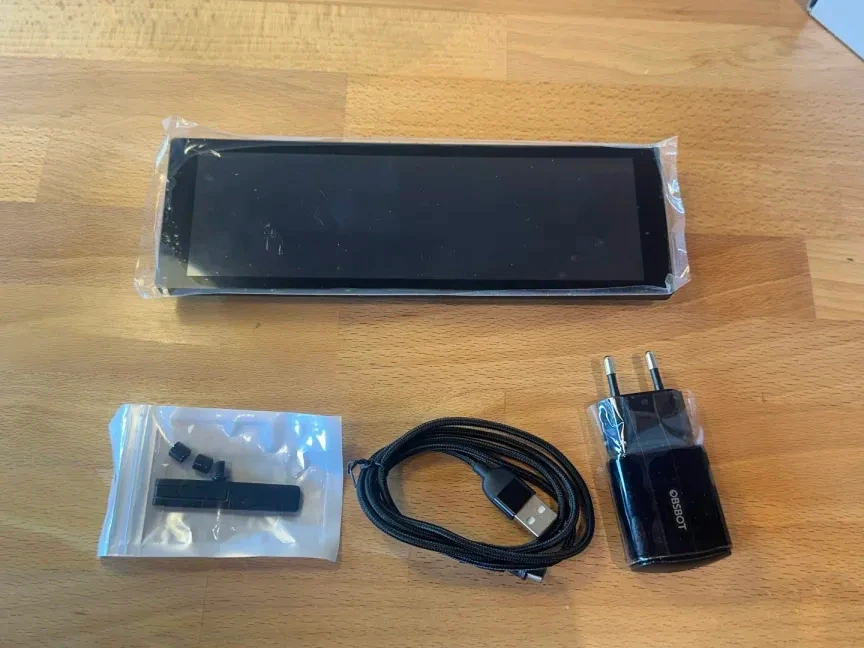
The hardware itself is only half of what you’re getting, though. A small screen with a fixed design would have been much less interesting to me. The reason I wanted to keep experimenting with the GOverlay Plus was that opening the software gave me so many ways to change what appeared on it.
Getting it connected
I was pleased with how approachable the initial setup felt. On the device, there’s a simple menu with options including Wi-Fi Setup, Settings, Reboot and Exit. That gave me a clear place to start instead of leaving me wondering how to get a blank display online.
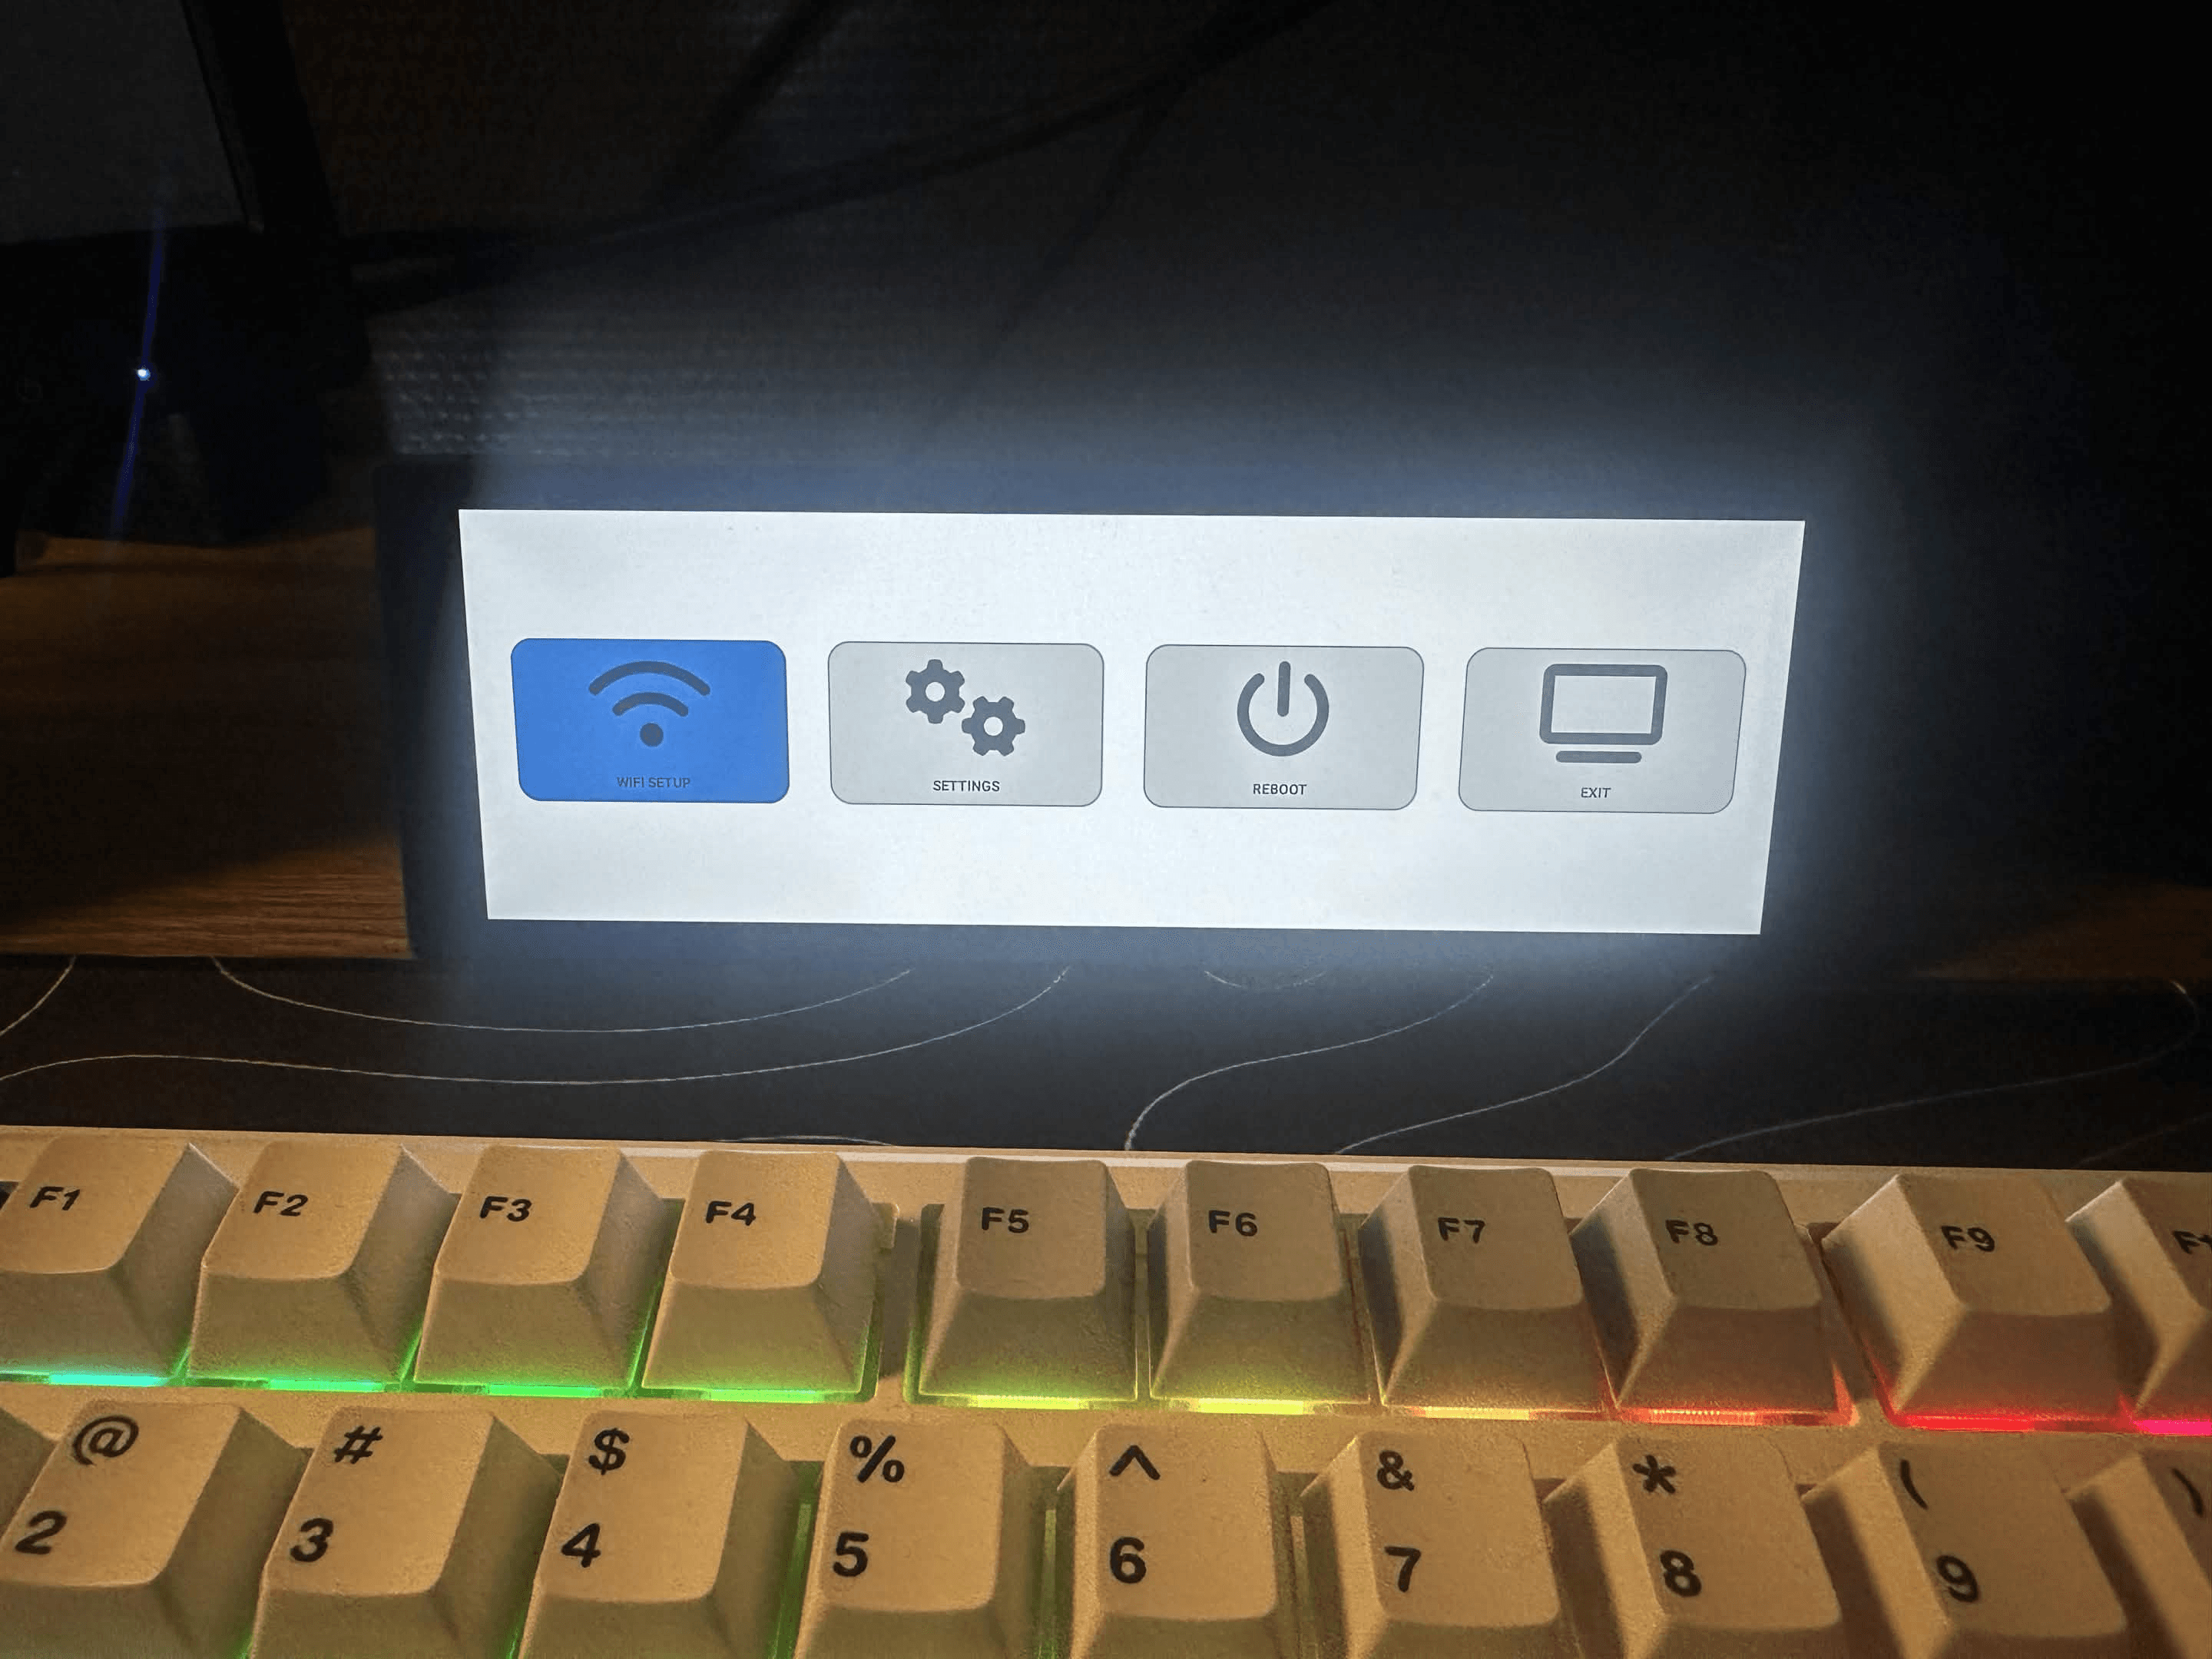
The screen isn’t touch-sensitive. You use the control on the back to navigate its menus, which is worth knowing before you try tapping the display during setup. Once the GOverlay Plus is connected to Wi-Fi, its profiles and layouts are managed through the GOverlay Plus web portal.
I like that the display doesn’t need an HDMI cable running back to my PC. You do need to give it power, and PC sensor information requires GOverlay’s computer app, but the screen itself has its own role in the setup. That opens up more possibilities for where to place it. It also means I don’t have to rearrange my normal Windows display layout just to use it.
The menus got me through the practical part. The fun part came next: choosing a background, looking through other people’s profiles and realizing how much I could customize. I could keep things clean and simple to suit the Blade Runner look, then switch to a completely different layout when I wanted the display to show something useful.
My first impression
Before trying it, the easiest way to describe GOverlay Plus would have been “a small extra screen.” Having it on my desk, I think that description misses why I enjoy it. The screen is small, but it gives me a space I can change without disturbing what I’m doing on my main monitors.
For a gamer, that might mean a themed dashboard or game information. For a streamer, it could mean keeping useful information in view while the main screens are busy. And if you’re into home servers or PC monitoring, you can build a display around the details you care about instead. I’m interested in all of those uses, which is probably why I’ve had so much fun exploring what GOverlay Plus can do.
So far, my favorite thing about it is the freedom to change my mind. The Blade Runner setup looks fantastic on my desk, but I’m not locked into using the screen as decoration. The software, the available widgets and the profiles people have shared are where this product starts to show what it’s capable of.
The software is what makes GOverlay Plus fun
Once the display was connected, I spent most of my time in the GOverlay Plus software. That’s where this product went from “a cool little screen on my desk” to something I could see myself changing again and again.
I enjoy making my setup feel like mine. Sometimes that means matching a wallpaper across everything; other times I’d rather have useful information in view. GOverlay Plus lets me do both without changing anything about my main monitors. I can choose a profile that already looks good, adjust it to fit my desk, or start putting together my own layout.
The editor gives you control over the pieces on the screen. You can move elements around, resize them, change colors and choose backgrounds. I like that it doesn’t force me to settle on one look. If I get tired of a design or want the display to serve a different purpose, switching profiles is easy.
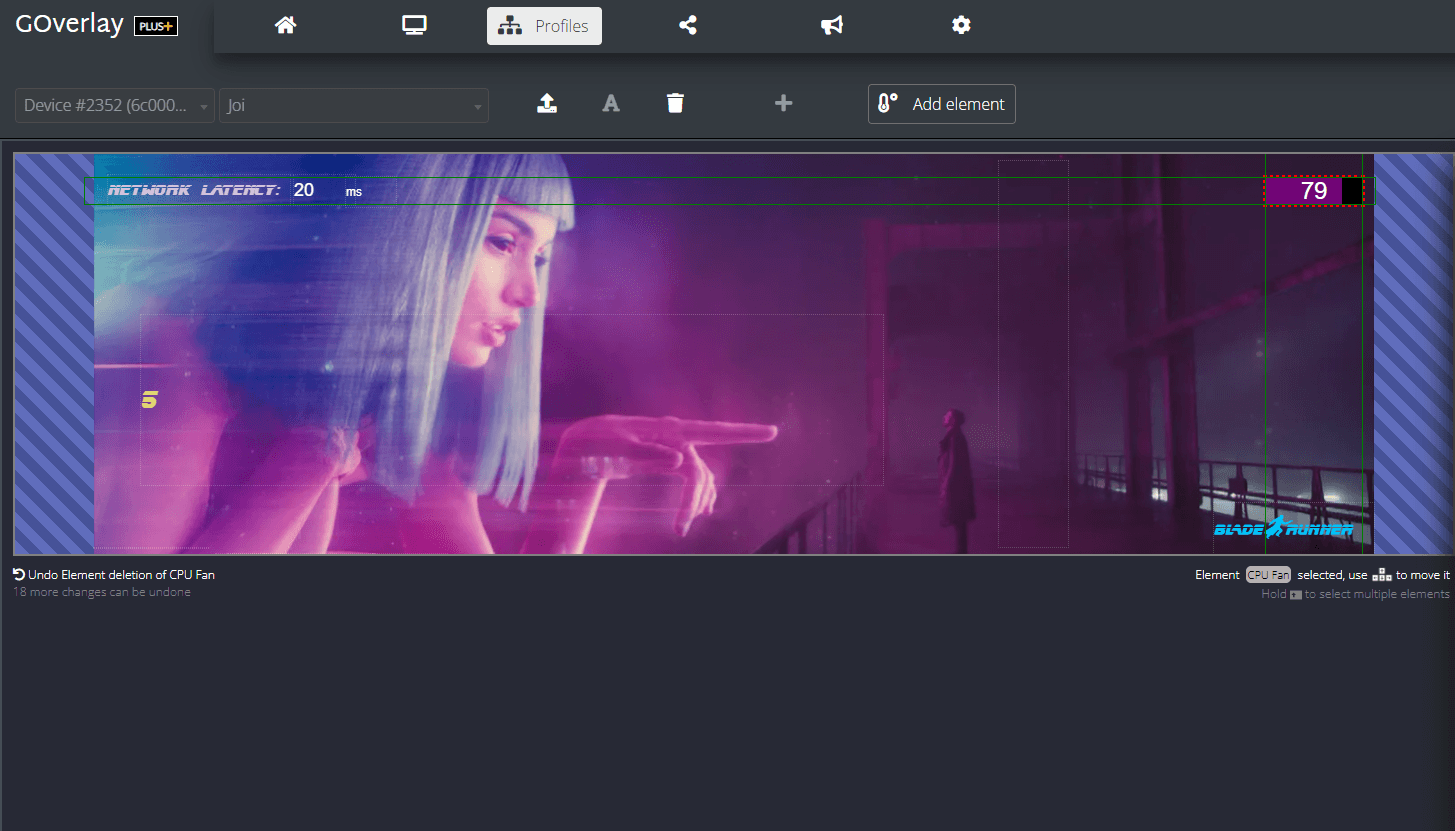
That ease of switching matters more to me than it might sound. I’ve had fun with tech that offers loads of customization, but only if I feel like spending an evening setting it up. Here, I can enjoy an existing profile and still have the option to change the details. When I’m in the mood to experiment, the tools are there. When I just want my desk to look good, I can choose a background and get on with what I was doing.
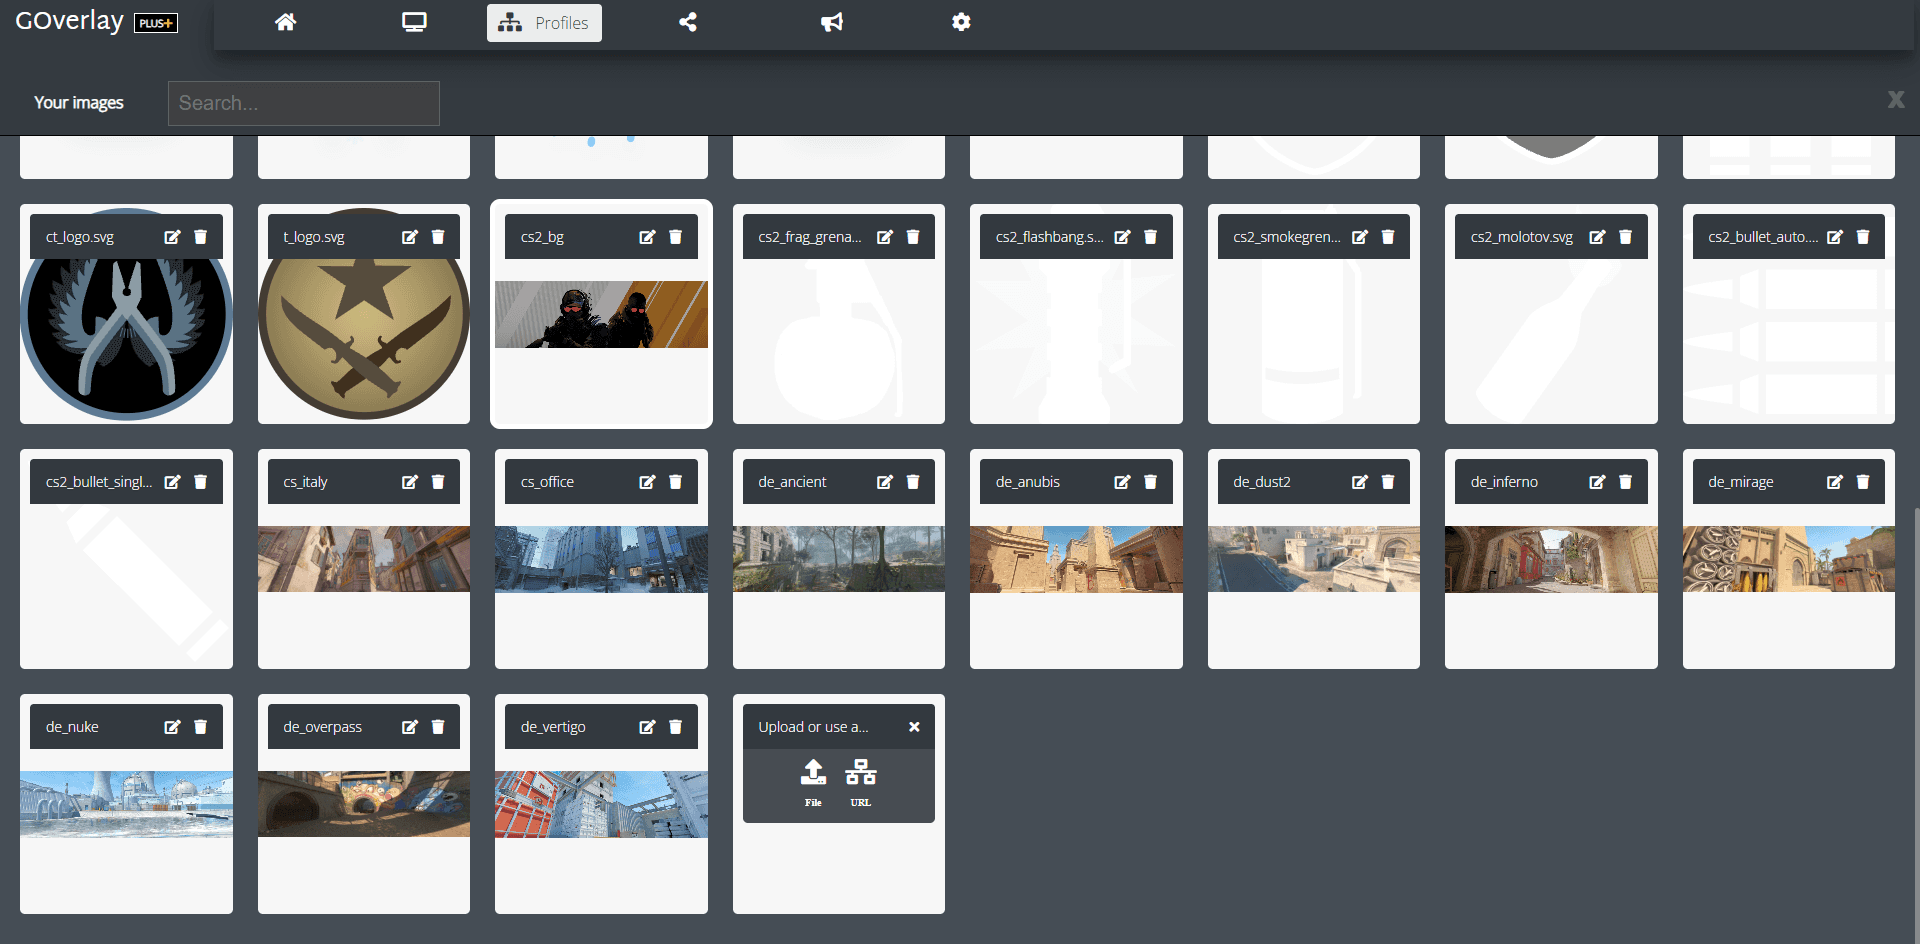
My Blade Runner setup is a good example. I wanted the GOverlay Plus to feel connected to my two larger monitors, and a matching background did that immediately. It’s a simple use for the screen, but I think it shows why customization is important: the exact design that looks right on my desk probably won’t be the one that looks right on yours.
You don’t have to build everything yourself
One of my favorite things to browse is the collection of profiles made by other GOverlay users. Looking through them gave me ideas I wouldn’t have come up with while staring at an empty editor. Some lean into PC monitoring, some are built around games, and others focus almost entirely on how the display looks.
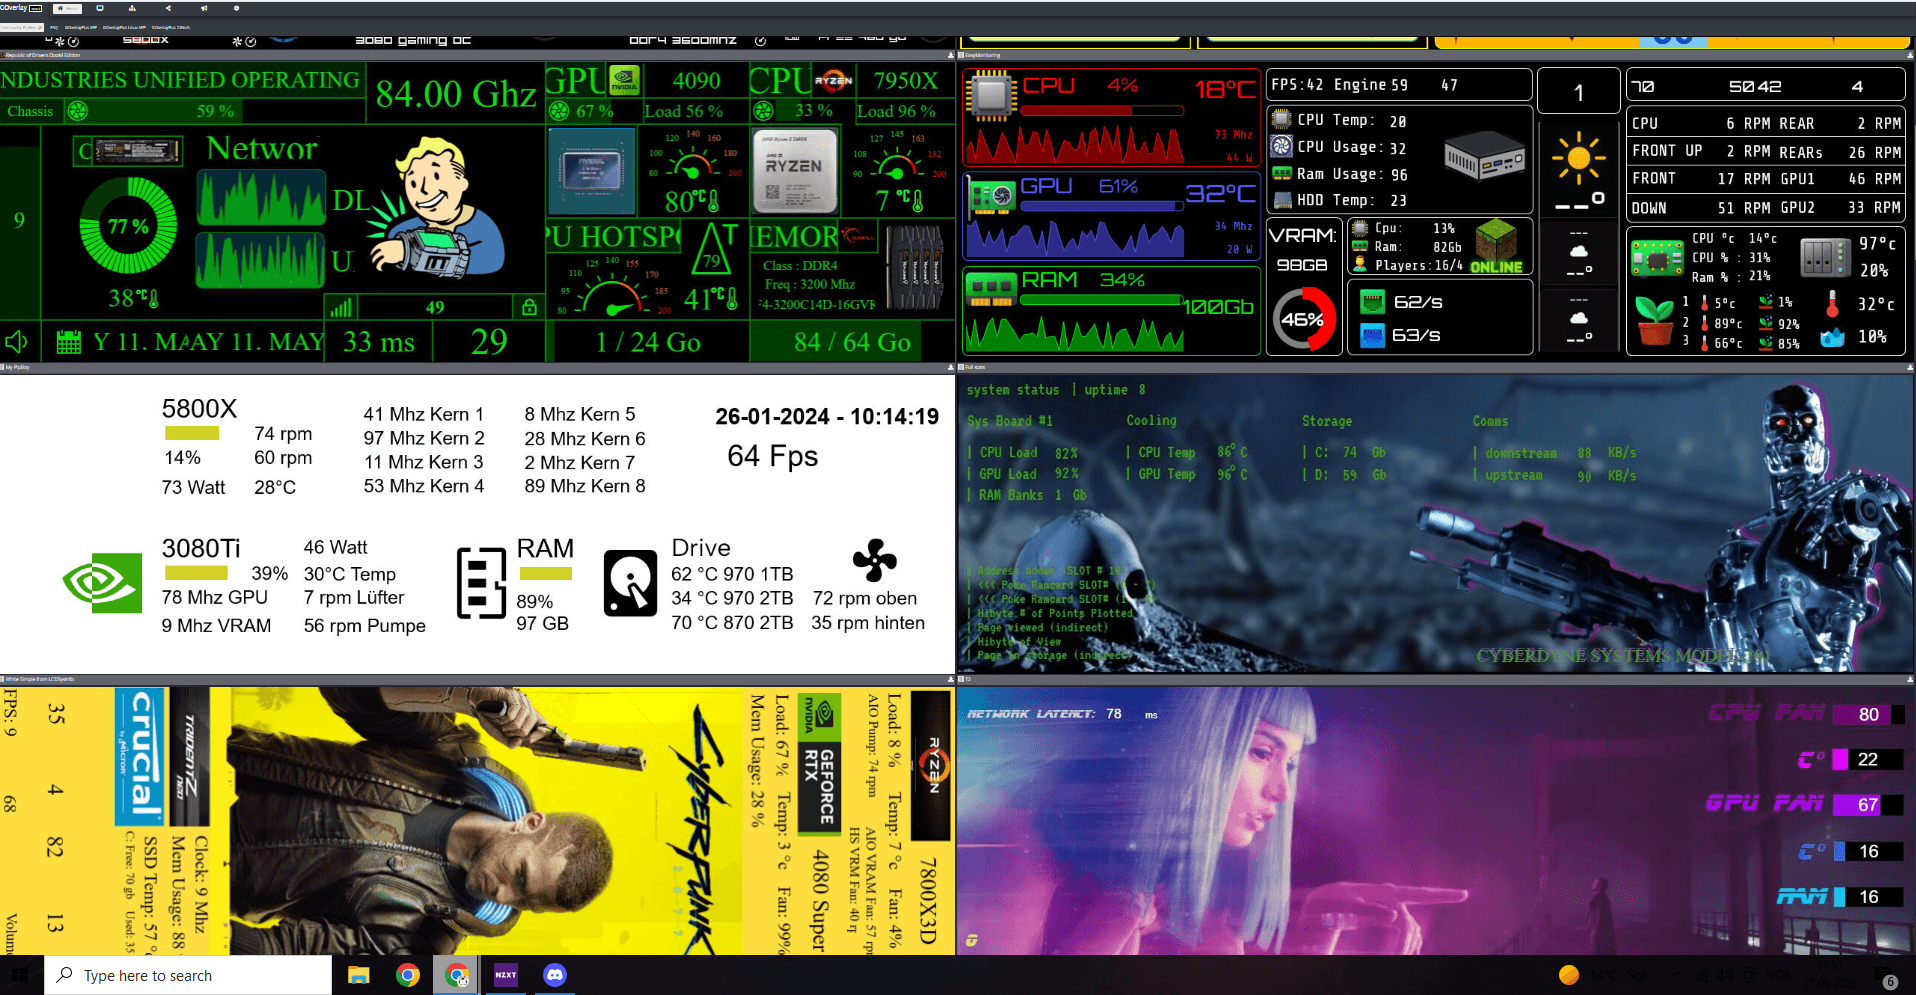
That community side makes the screen easier to recommend. I know plenty of people who would enjoy having a great-looking display on their desk but have no interest in designing every gauge and graphic themselves. Starting with someone else’s profile is a much more inviting way in. You can use it as inspiration, then change the things that matter to you.
It also makes the GOverlay Plus feel less like a product with a fixed set of built-in themes. There are profiles to explore in the web portal and designs shared through the GOverlay community forum. I found myself looking through them even when I wasn’t planning to change my own screen. It’s the same feeling I get when I see a clever PC setup and immediately start thinking about what I could borrow for mine.
There’s much more here than backgrounds and temperatures
A good wallpaper was my starting point, but GOverlay Plus has a surprisingly broad selection of elements you can add to a profile. The screenshot below gives a much better sense of it than a short list would.
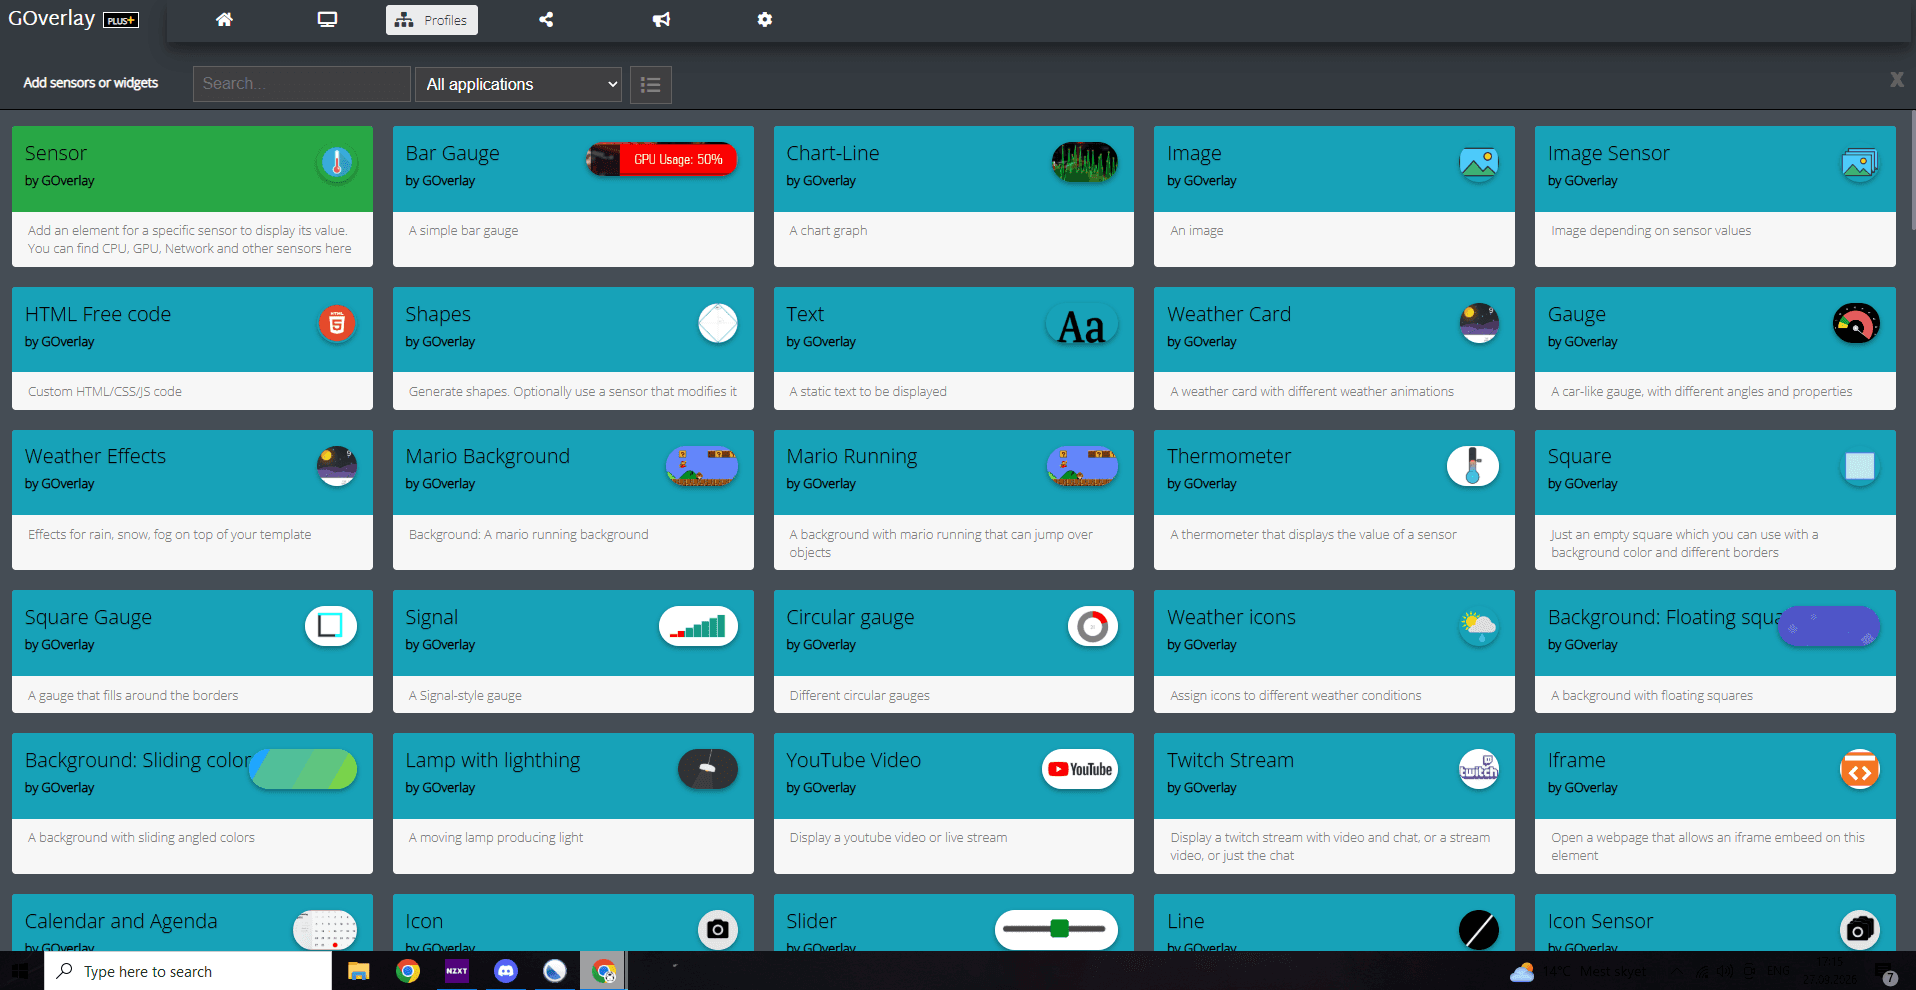
For a PC dashboard, you can use sensors and present the readings as numbers, bar gauges, charts or a thermometer. You could keep the layout restrained and show just the details you check most often, such as CPU and GPU information. If you want something more visual, you have images, shapes, weather effects and animated elements to work with.
Then there are options I wouldn’t have expected to find on a little desk display: a calendar, YouTube videos or live streams, Twitch video and chat, and even the Mario running background. More advanced users can add custom HTML, CSS and JavaScript elements. I haven’t needed to build anything that complicated to enjoy the screen, but I like knowing the option exists.
The range is what makes it interesting to different people. If you stream, a screen that can show stream-related content has an obvious appeal. If you play games, a dashboard can be part of the theme of your setup or show information tied to a game. If you spend your time tinkering with PCs and servers, you might care much more about the readings than the wallpaper. I have interests in all three, so it’s nice that I don’t have to choose one permanent identity for the display.
There is one useful setup detail here: to show sensor information from your computer, you need the GOverlay Plus app on that computer. The display can show things like time or weather without relying on a PC, but PC readings have to come from somewhere. Once you understand that, the distinction is simple.
The game profiles are where it gets really creative
GOverlay also shows examples of additional apps and plugins on its website, including HWiNFO and several games. I’m including a screenshot of that section here because it helps explain how far people can take a profile beyond changing its colors.
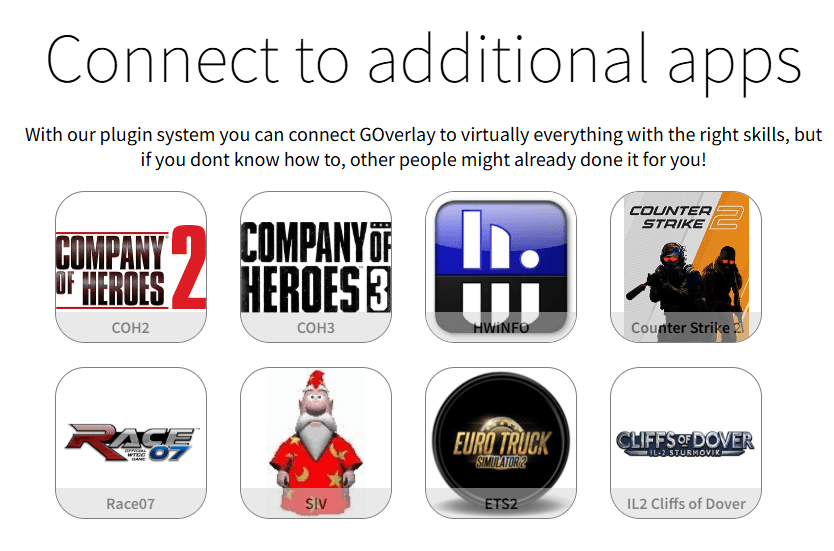
The Counter-Strike 2 dashboard shared on GOverlay’s forum is one of the coolest examples I found. It’s designed to show game information such as health, ammo, team and equipment on the GOverlay Plus. The creator even included a background option that changes with the map.
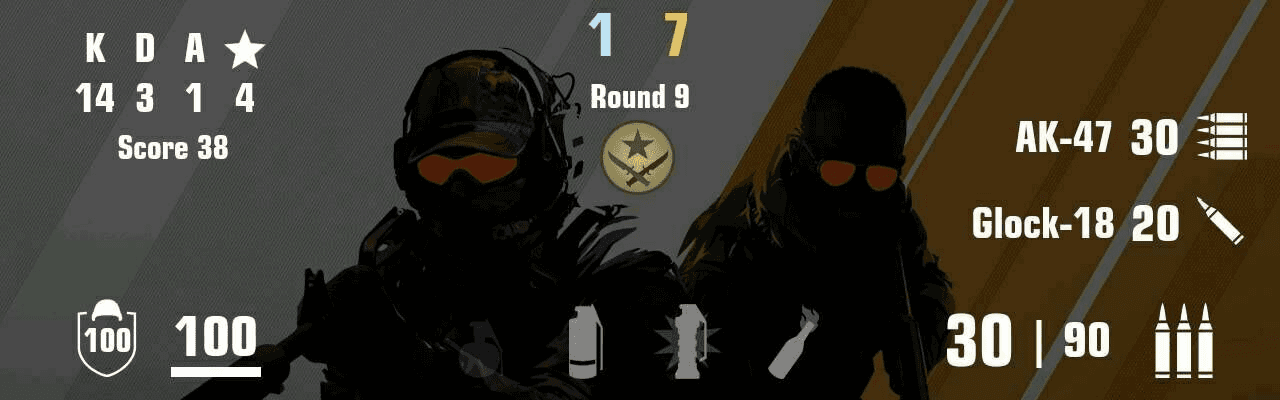
I think that’s a great illustration of what makes the community profiles exciting. Someone had a specific idea for what they wanted beside their gaming monitor, built it, and shared it for other people to try. You can look at that profile for the design alone, or take the time to set up the game information if that’s what interests you.
It does require more setup than selecting a wallpaper: the profile creator says you need to enable the CS2 plugin and place a game-state integration configuration file in the game’s cfg folder. I’d rather mention that than make it sound as though every advanced profile works the moment you select it. The simpler designs are there when you want them; the deeper projects are there when you feel like tinkering.
A screen I can change along with my setup
What I enjoy most about the software is that I’m already thinking of different places and different jobs for the GOverlay Plus. The Blade Runner background makes it look fantastic beside my gaming PC. On another day, I could put practical information there instead. I don’t have to buy another device or rebuild my desk to try a different idea.
That’s why I’ve spent more time looking through profiles and widgets than I expected. The screen looks good, but choosing what it should do is the part that keeps pulling me back. And once I moved it away from the matching-monitor setup, I found another spot where it looked right at home.
It found a place outside my gaming setup, too
The other spot was beside my ZimaBlade. I put the GOverlay Plus next to it on my black IKEA Skådis, with my headset and Google Home nearby, and it looked like it belonged there. It was a very different scene from the Blade Runner photo, but the screen still made sense.
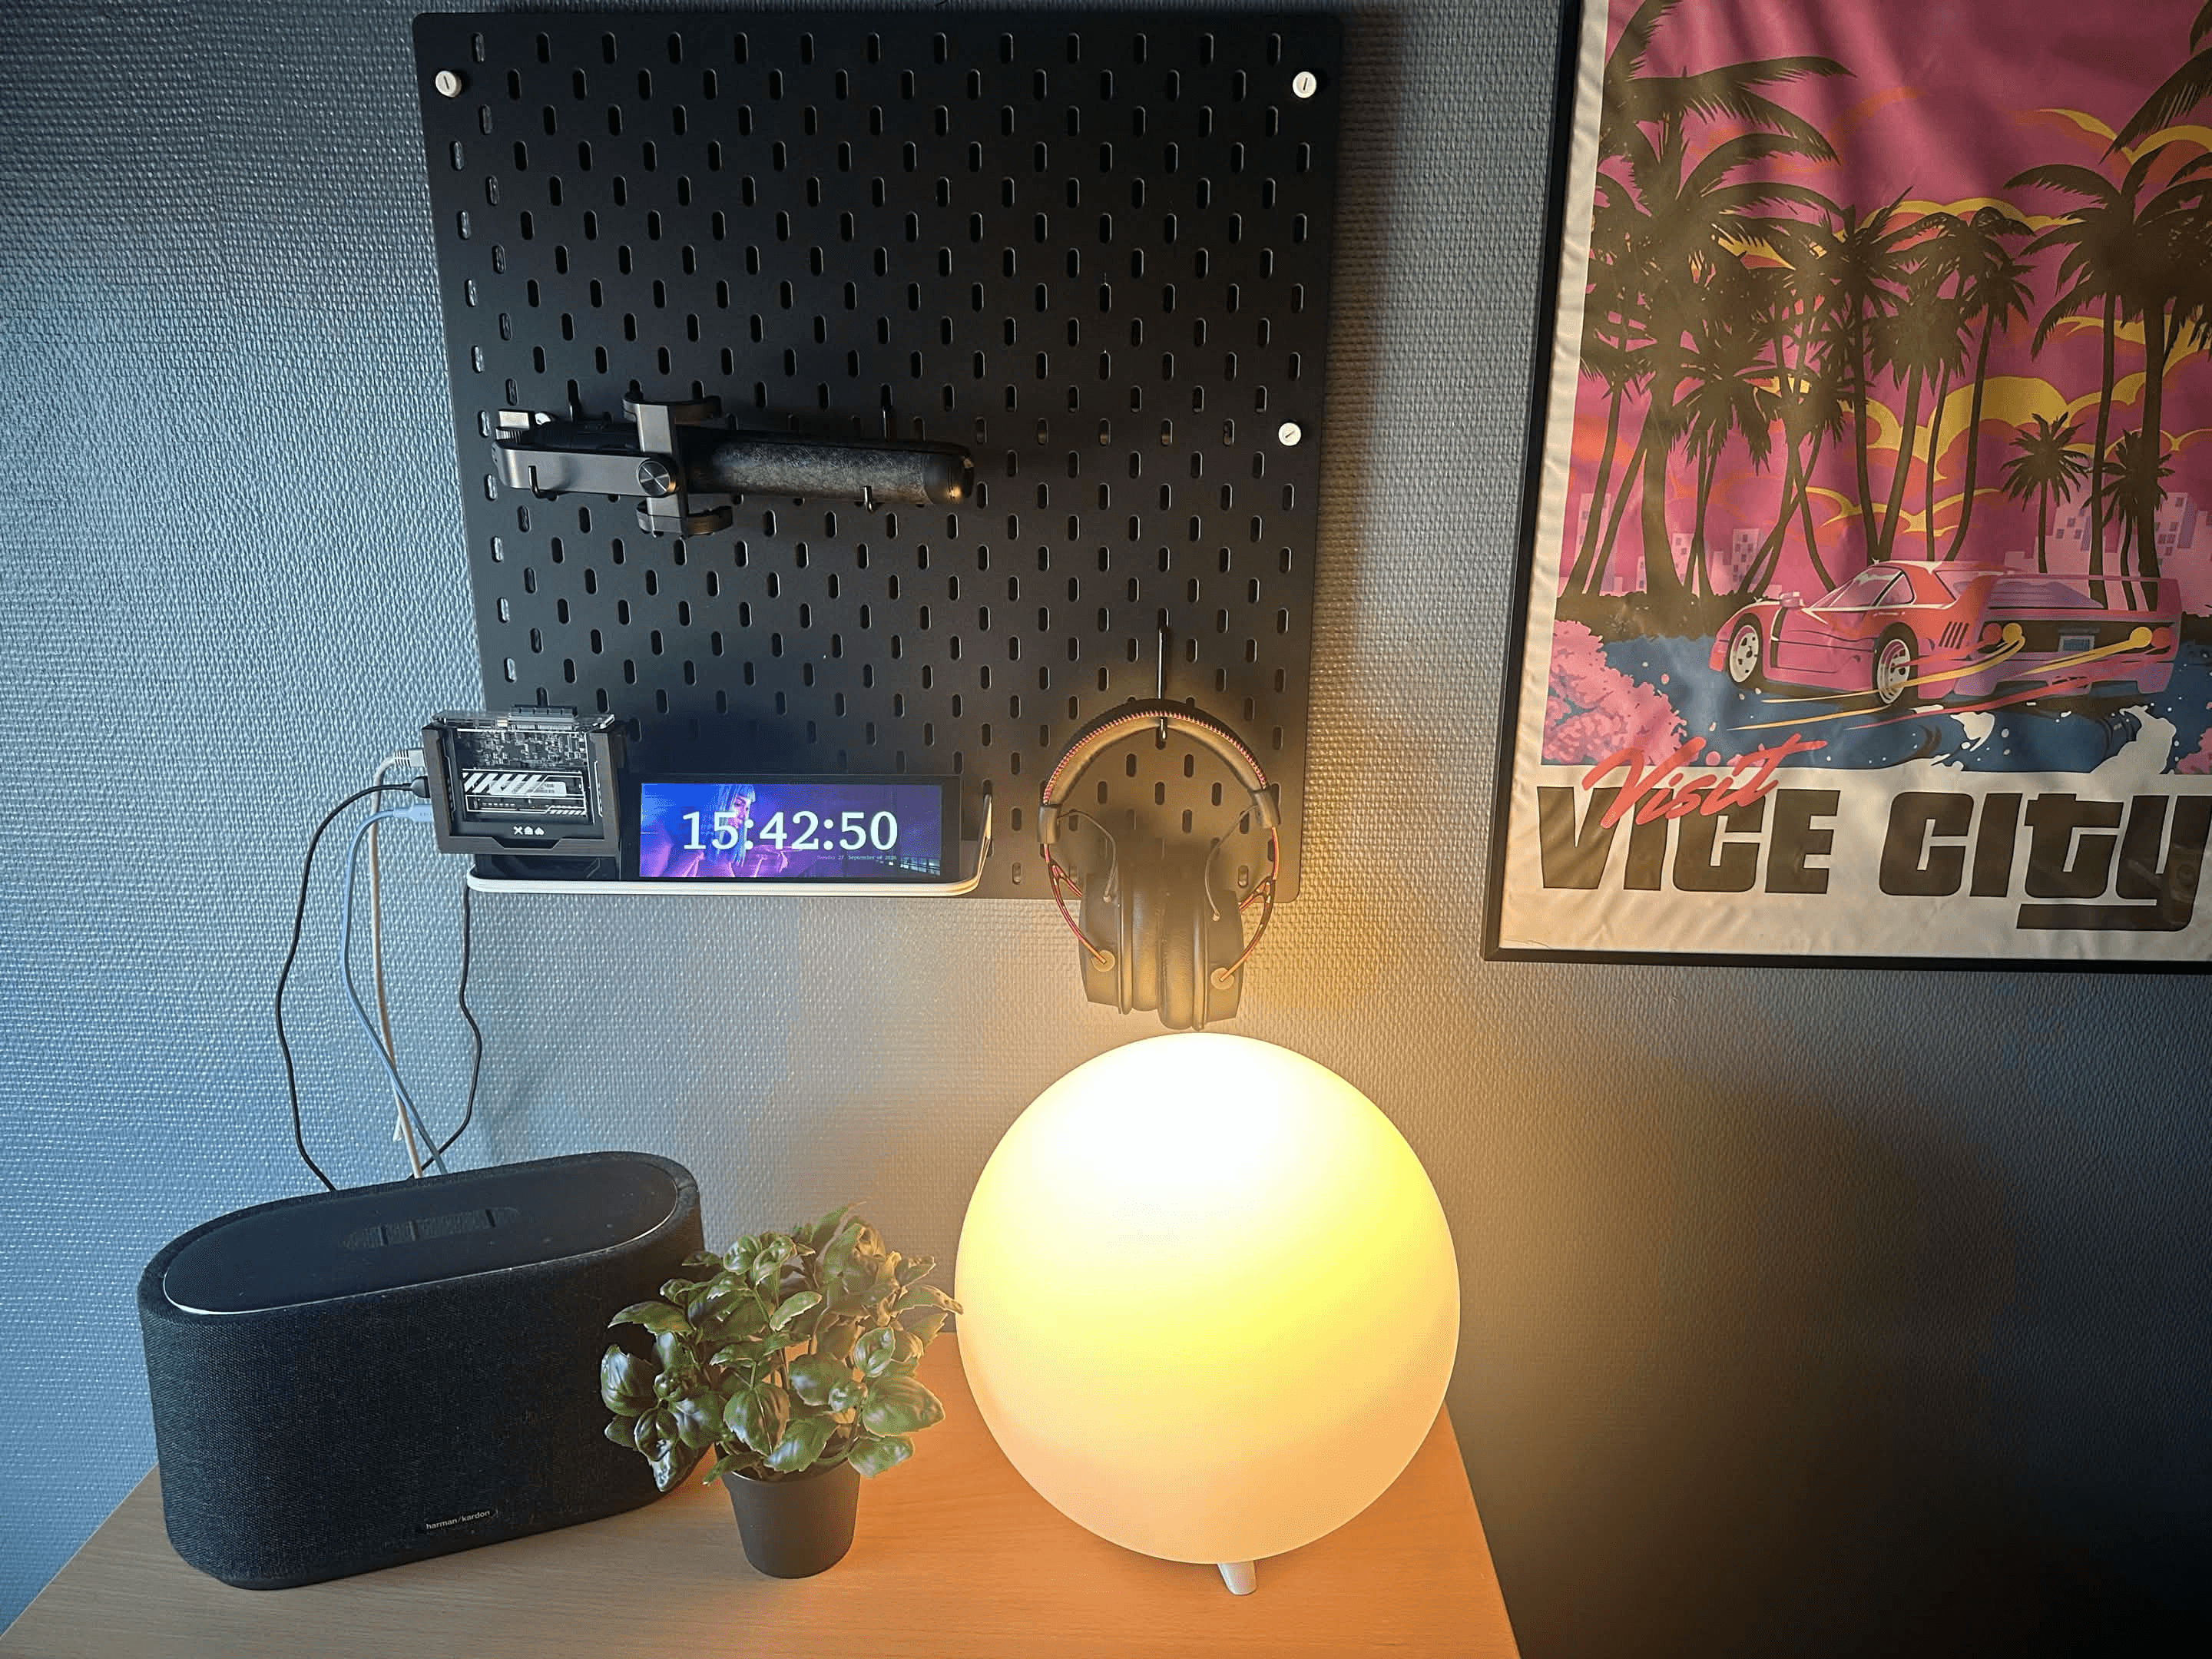
That photo gets across something I really like about this product. On my gaming desk, GOverlay Plus can be part of the visual theme. Beside my home server gear, I immediately start thinking about what information I could put on it instead. A small display for server status, temperatures or other readings would be much easier to glance at than opening a dashboard on my PC every time I wanted to check something.
To be clear, the photo shows where I’ve placed it it isn’t proof that I’ve finished a live ZimaBlade monitoring setup. That would be its own project, with the right data source configured. But it’s a project I’d actually want to try. GOverlay describes support for monitoring remote computers or servers, and the customizable widgets give you a lot of room to decide how that information should look.
I appreciate products that give me ideas after the initial setup is over. The GOverlay Plus does that. Putting it beside the ZimaBlade made me think about what I’d want to see at a glance, which readings would be useful, and how to make a server dashboard that still looks good in the room.
Then I changed the look again
Of course, I still love it as part of a gaming setup. The vertical photo I took with a Cyberpunk profile shows how different the display can feel with another design.

The Blade Runner background across my monitors is clean and coordinated. The Cyberpunk profile has a completely different energy. Both work on the same little screen, and I didn’t have to change the hardware or commit my entire desk to one theme.
The HYTE Y70 Touch Infinite Panda is another product that makes a screen part of your PC setup. It looks amazing, but it costs $399.99 on HYTE’s website. The GOverlay Plus is listed at $99. If the display is what interests you most, I think GOverlay Plus is the better buy. I get a screen I can customize and place wherever it looks best, while keeping the PC case I already own. HYTE gives you a larger touchscreen built into an entire new case, so it makes sense if you want the case too. For my setup, I’d much rather spend less and have the freedom to move the display around.
This is where GOverlay Plus feels especially personal to me. I can spend time making a setup look the way I want, and I’m definitely the kind of person who notices when a small detail pulls everything together. The display gives me one more place to do that. If my wallpapers change, the GOverlay Plus can change with them. If I’d rather see useful information than artwork, I can switch direction again.
I can see why a streamer would enjoy that freedom as well. A screen that fits the look of a stream one day could show chat or other information on another. For someone who mostly wants PC stats, the same hardware can become a dashboard focused on readings instead. You don’t need to have the same taste in setups as I do to find a use for it.
What I’d want to know before buying one
After using and photographing the GOverlay Plus, I’d recommend thinking about what you want your extra screen to do. This one is especially appealing if you want a display for a custom layout, a theme, widgets or information you can check while your main monitors stay busy. It doesn’t extend your computer desktop, so it won’t give you another place to drag normal application windows.
It’s also worth knowing how the different features are set up. The web portal handles profiles and customization. If you want readings from your PC, you’ll need the GOverlay Plus app on that computer. More ambitious ideas, like certain game profiles or a custom server dashboard, can take additional configuration. And because the screen isn’t touch-sensitive, you navigate its built-in menus with the control on the back.
None of that spoiled the experience for me. The basic setup felt approachable, and I enjoyed being able to start with existing designs while I explored what the editor could do. I just think the product makes the best impression when you know what it is: a small display that you get to give a purpos
Is the GOverlay Plus worth it?
For my setup, yes. I would recommend the GOverlay Plus 7.8-inch to someone who enjoys customizing their desk and wants a small display that can do more than show a fixed image. It looks excellent with a coordinated gaming theme, the software makes it easy to change profiles, and the selection of widgets gives you plenty of reasons to keep experimenting.
The part that surprised me most was how naturally it fitted into two different corners of my room. Next to my PC, it completed the look I wanted. Next to the ZimaBlade, it made me want to build a useful little monitoring screen. Those are different reasons to keep a product on your desk, and GOverlay Plus gives me both.
I’m still going to try new profiles and see what else I can make it show. That’s probably my clearest recommendation: after the photos were taken and the review was written, I still wanted to keep playing with it. If a customizable companion display sounds like something your desk could use, you can explore the GOverlay Plus and its available features on GOverlay.com.
Keep reading

