PC Guides
6 Things You Should Do After Getting a New Gaming PC
A new gaming PC can work perfectly while still leaving some of its performance unused. These six setup steps help you install the correct graphics driver, run your memory at its intended speed, fix your monitor settings, reduce unnecessary startup apps, customize Windows, and keep an eye on temperatures.
By worth-the-cart
•
•
0 min read


Your new gaming PC can boot normally, launch a game and still leave performance on the table. A 165Hz monitor might be running at 60Hz, a fast memory kit may be using a slower default profile, and Windows could be relying on a working graphics driver that is not the version you actually want for gaming.
None of that means the PC is broken. It simply means that building or buying the hardware is only part of the setup. Windows tries to make a new computer usable without asking the owner to understand every component, while motherboard manufacturers often prioritize a safe first boot over the fastest memory settings. That is sensible, but it also leaves a few jobs for you.
The useful changes are not all equal. Updating the GPU driver, checking the memory profile and selecting the correct monitor refresh rate can affect hardware performance or how the PC feels. Removing unnecessary startup apps is more about boot time and background activity. Desktop customization comes later, once the important settings are correct.
You do not need to spend more money or install a folder full of “PC optimizer” programs. Set aside around half an hour, work through the settings in order and make sure the parts you already paid for are behaving as intended.
1. Install or update the correct GPU driver
A graphics driver is the software layer that allows Windows, games and applications to communicate properly with your graphics card. Windows 11 normally installs recommended hardware drivers through Windows Update, so a new PC can display an image without you doing anything. However, Microsoft notes that optional driver updates are not installed automatically, and the version supplied through Windows Update may not be the newest gaming driver offered by the GPU manufacturer.
That is why the first download on a gaming PC should come from NVIDIA, AMD or Intel—not from a third-party driver website.
If you do not know which graphics card is installed, right-click the Start button, open Device Manager, expand Display adapters, and read the model name. You can also open Task Manager with Ctrl + Shift + Esc, select Performance, and look for the GPU entry. A processor with integrated graphics may appear beside the dedicated graphics card, which is normal. Download the driver for the dedicated GPU used to run your games.
Use the official download page that matches your hardware:
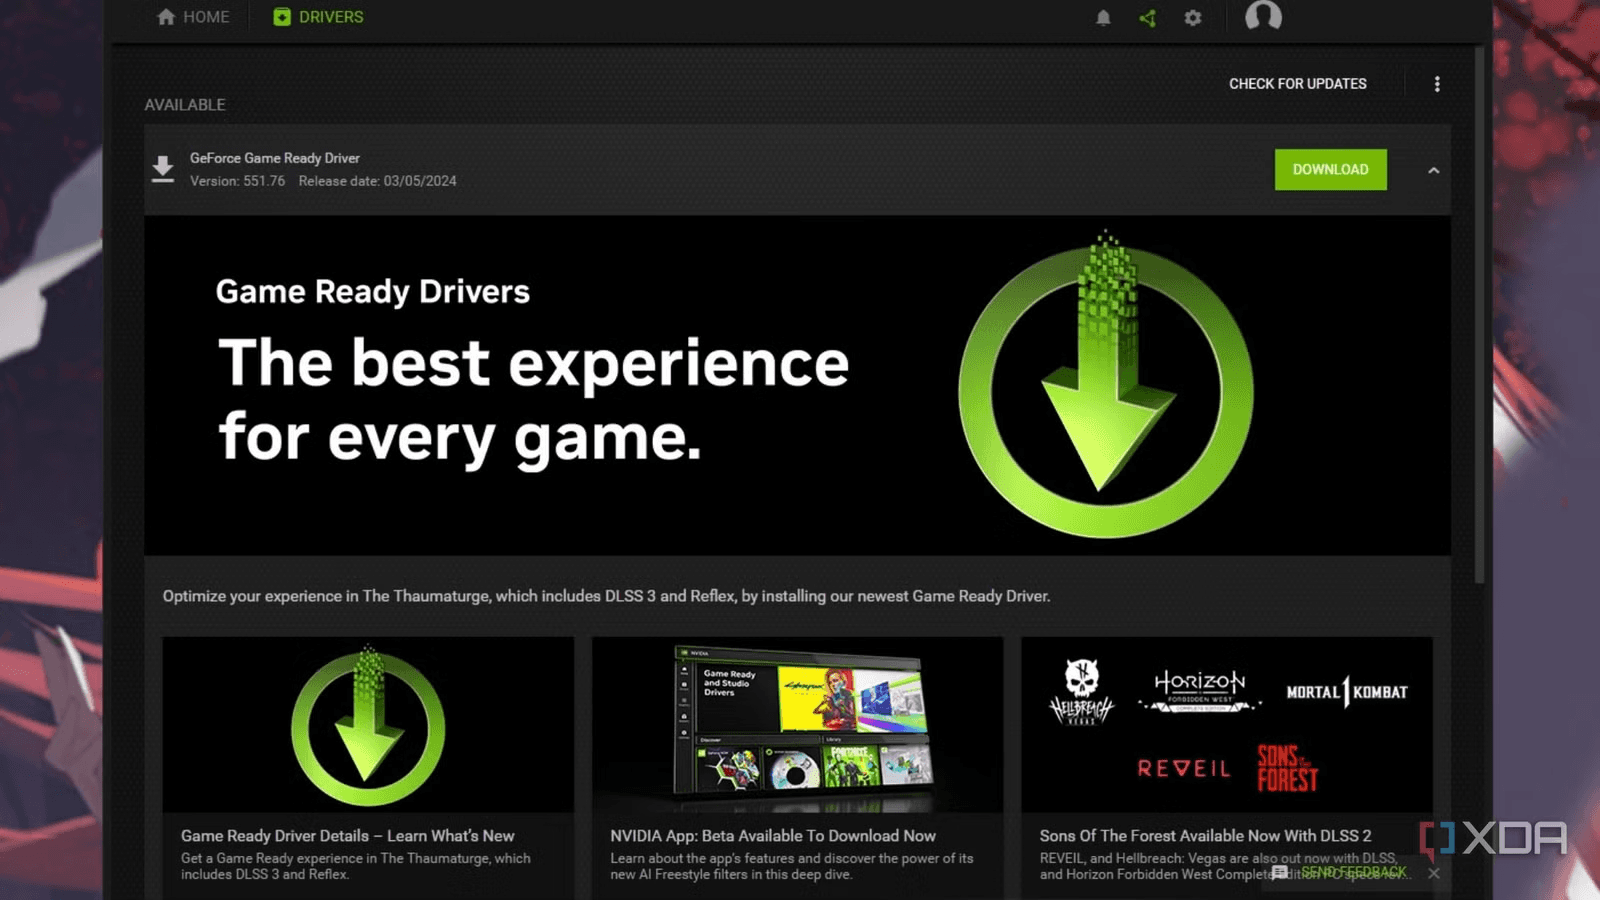
NVIDIA gaming systems will usually want the Game Ready Driver. NVIDIA also offers Studio Drivers for people who care more about tested support in creative applications, so do not choose one merely because “Studio” sounds more advanced. AMD Radeon owners can get the relevant driver and AMD Software through the company’s support page, while Intel’s Download Center covers Arc graphics and the integrated graphics found in Intel processors.
Close any games before starting the installer, check that the detected graphics card and version of Windows are correct, and use the normal recommended installation unless you have a reason to change individual components. Restarting afterward is worthwhile, even if the installer does not make it sound urgent.
You normally do not need to uninstall the existing driver first. Driver-removal tools and clean installations are useful when you are replacing an AMD card with an NVIDIA card, moving in the opposite direction, or diagnosing a persistent driver problem. They are unnecessary extra work for a new PC that is already stable.
Do not expect every driver update to add a noticeable number of frames per second to every game. The larger benefit is having the correct support for the GPU, current game profiles, bug fixes and access to the manufacturer’s control software. Once the installation is finished, open the NVIDIA, AMD or Intel application and confirm that it recognizes the correct GPU and shows the installed driver version.
2. Enable XMP or EXPO so your RAM runs at its intended speed
The speed printed on a memory kit is not always the speed a PC uses on its first boot. Memory modules begin with conservative settings designed to work across a wide range of compatible systems. Intel describes this as a fail-safe boot using default JEDEC settings; the faster profile can then be selected in the BIOS.
This is where XMP and EXPO come in. Intel XMP, short for Extreme Memory Profile, stores tested frequency, timing and voltage settings on a compatible memory kit. AMD EXPO, or Extended Profiles for Overclocking, provides a similar approach for DDR5 memory on AMD’s AM5 platform.
The branding can become confusing because the name you see depends on the processor, memory kit and motherboard. Some AMD motherboards can load an XMP profile, and manufacturers may use labels such as A-XMP or DOCP on certain boards. The motherboard manual is the reliable place to check if the BIOS does not show the exact word you expected.
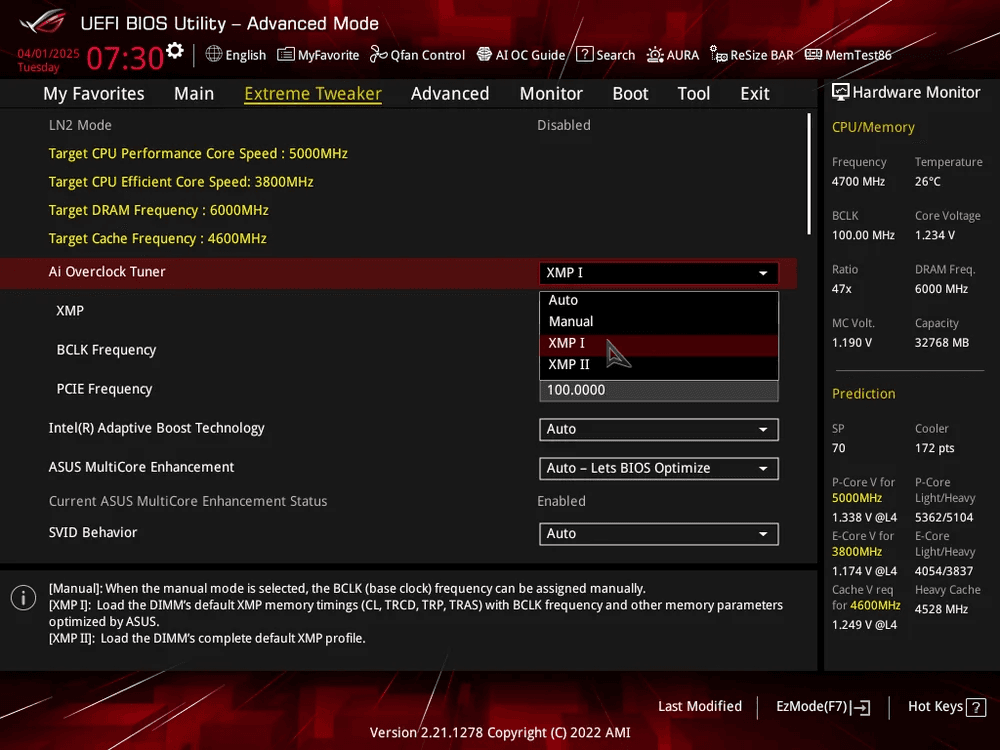
Enabling a profile usually takes only a few minutes:
Restart the PC and press the key shown for entering the BIOS or UEFI, commonly Delete or F2.
Find the memory-profile setting. It may appear on the main page or inside an overclocking, performance, memory or AI Tweaker menu.
Select XMP Profile 1, EXPO I, EXPO Profile 1, or the closest equivalent recommended by the motherboard manufacturer.
Save the changes and exit. The first restart can take longer than usual while the motherboard retrains the memory.
Once Windows has loaded, open Task Manager > Performance > Memory and check the reported speed. Compare it with the advertised effective speed of the kit. If you bought DDR5-6000, for example, the aim is to see a value around 6000 MT/s rather than a much lower safe default. Some older utilities may present memory clock information differently, so do not assume the profile failed simply because one program shows a number that looks like half the advertised DDR rate.
XMP and EXPO are commonly used, but they are still forms of memory overclocking. Stability depends on the processor’s memory controller, the motherboard, the BIOS version, the number of memory modules and the memory kit itself. A four-stick setup can be harder to run at a high advertised speed than a two-stick kit, especially when the capacity is also high.
If the PC starts crashing, produces memory-related errors or refuses to boot after the change, return to the BIOS and disable the profile. You can then update the motherboard BIOS, try a lower supported memory speed or check the board’s memory compatibility list before trying again. If the system cannot reach the BIOS at all, follow the motherboard manual’s instructions for safely clearing the CMOS rather than pressing random buttons or repeatedly cutting the power.
Some laptops and locked-down prebuilt desktops do not expose XMP or EXPO settings. In that situation, the absent option is a limitation of the system rather than something you overlooked. It is better to leave the PC stable at its supported settings than force an advertised memory number the machine cannot reliably hold.
3. Make sure your monitor is using the correct refresh rate
It is surprisingly easy to buy a fast gaming monitor and then use it at 60Hz without realizing it. Windows will produce an image at 60Hz, so nothing looks obviously broken, but the screen is updating only 60 times each second. If the monitor supports 144Hz, 165Hz or 240Hz, leaving it at 60Hz means you are not seeing the smoother motion you bought it for.
Refresh rate and frame rate are connected, but they are not the same thing. Your GPU renders frames, while the monitor refreshes the image it displays. Changing a monitor from 60Hz to 165Hz will not make the graphics card render 165 FPS. It allows the screen to display more of the frames the GPU is already producing, provided the game and PC can run quickly enough.
The difference is usually easiest to notice when moving the mouse, scrolling through a page or turning the camera in a fast game. Moving from 60Hz to a high-refresh-rate display can feel substantial. The jump between two already-fast settings, such as 144Hz and 165Hz, is much smaller, so there is no reason to reduce the resolution or create instability just to select the largest number in the menu.
To check the setting in Windows 11, open Settings > System > Display > Advanced display. If you have more than one monitor, select the correct display first. Under Choose a refresh rate, select the highest rate the monitor officially supports at its native resolution. Microsoft’s refresh-rate guide confirms that the available choices depend on the display and its supported modes.
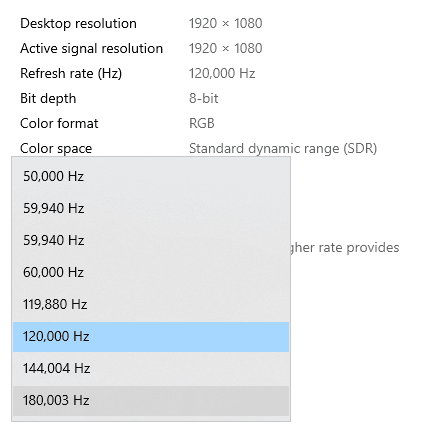
Do not select a rate blindly if Windows shows that it requires a resolution change. A 1440p monitor running at its native resolution and intended refresh rate will usually look better than the same monitor forced to a lower resolution for a slightly higher number. The correct target is the best refresh rate supported at the resolution you actually want to use.
If the advertised rate does not appear, start by checking the physical connection. On a desktop with a dedicated graphics card, the monitor cable should normally be connected to one of the ports on the graphics card, not the display outputs beside the motherboard’s USB ports. A monitor connected to the motherboard may use integrated graphics or fail to produce an image at all, depending on the processor and BIOS configuration.
The cable and port also have to support the selected combination of resolution and refresh rate. DisplayPort is commonly used for high-refresh-rate PC monitors, but a suitable HDMI connection can work just as well when both the monitor and graphics card support the required HDMI version. Look at the monitor manual before buying a new cable; switching cables without checking the port specifications can leave you with exactly the same limit.
Some monitors require their fastest mode to be enabled through the monitor’s own on-screen menu. It may be described as an overclock, high-refresh-rate mode or gaming setting. Updating the GPU driver, trying another port and returning the monitor to its native resolution can also make a missing option appear. After making the change, reopen Advanced display and confirm that Windows still shows the intended rate.
Games can have their own resolution, refresh-rate, frame-limit and display-mode settings, so check those separately if one game still feels locked to 60Hz. V-Sync, an in-game frame cap or a limit in the GPU control panel can affect the result even when Windows is configured correctly.
4. Stop unnecessary programs from opening with Windows
A clean Windows installation tends to start quickly. The slowdown often appears later, after game launchers, chat apps, hardware utilities, cloud services and media programs have all decided that they should open the moment you sign in.
Disabling an app at startup does not uninstall it or stop you from opening it normally. It simply prevents the program from launching before you ask for it. That can shorten the time between entering your password and having a responsive desktop, while also reducing the number of background processes competing for memory and processor time.
Windows 11 provides two simple places to manage these apps. Open Settings > Apps > Startup, or press Ctrl + Shift + Esc and select Startup apps in Task Manager. Task Manager is particularly useful because it can show an estimated startup impact beside supported programs. Microsoft provides the same two methods in its official guide to configuring startup applications.

Look for software you recognize and do not need immediately after every login. Game launchers, music apps, meeting software, messaging clients and update assistants are common candidates. If you only use the Epic Games Launcher once every few weeks, there is little benefit in loading it every morning. You can disable its startup entry and open it normally when you want to play something from that library.
Hardware-control programs require more judgment. You may want an RGB application to launch automatically if it applies your fan curve, mouse settings, lighting profile or AIO display configuration. If it only changes decorative lighting that the device remembers without the software, allowing it to run all day may be unnecessary. Check what the program controls before turning it off.
Leave Windows Security and any security software you intentionally use alone. The same caution applies to audio components, touchpad tools, accessibility software, backup or synchronization services you depend on, and programs with names you do not recognize. An unfamiliar entry is something to research, not something to disable automatically.
It is also worth keeping expectations realistic. Removing several heavy launchers can make sign-in feel cleaner and may release useful memory, especially on a PC with limited RAM. It is unlikely to create a dramatic FPS increase on a powerful gaming system that already has plenty of resources. The main improvement is that Windows reaches an idle, usable state faster and does not fill the notification area with programs you never asked to open.
Make the changes in a small batch, restart once and see whether anything you rely on is missing. Every startup switch can be turned back on later, which makes this a much safer place to experiment than the Windows Registry or a random “debloat” script.
5. Customize Windows without turning it into a mess
Once the drivers, memory and display are configured, you can make the desktop feel like your own. Windows customization does not improve the PC’s gaming performance, and you do not need four different programs just because they appeared in a setup video. Each tool changes a different part of the interface, so choose the ones that solve something you actually want to change.
Installing one customization app at a time is the sensible approach. You will know which program caused the problem if the taskbar behaves strangely after a Windows update, and you avoid running several tools that attempt to modify the same interface element.
TranslucentTB
TranslucentTB is a focused option for changing the appearance of the Windows taskbar. It can make the taskbar transparent, blurred, acrylic or opaque without replacing the entire Windows shell. This works particularly well with a clean wallpaper because the taskbar blends into the desktop instead of forming a solid block across the bottom of the screen.
The app is most useful for someone who wants a visible change without learning a complicated theme system. You can choose a style from its tray icon and decide whether it should start with Windows. If you later install another taskbar-modification tool, avoid enabling overlapping effects in both applications.
Wallpaper Engine
Wallpaper Engine replaces a static background with animated, interactive or audio-responsive wallpapers. Its large community library makes it easy to match a desktop to the lighting and color scheme of a gaming setup, although quality and resource use vary between wallpapers.
Animated backgrounds need some GPU, CPU or memory resources while they are running. Wallpaper Engine pauses itself by default while you are in a game, and its performance settings can be configured to stop a wallpaper completely and free its memory when a full-screen application opens. That is a better solution than assuming every animated wallpaper will run invisibly in the background without any cost.
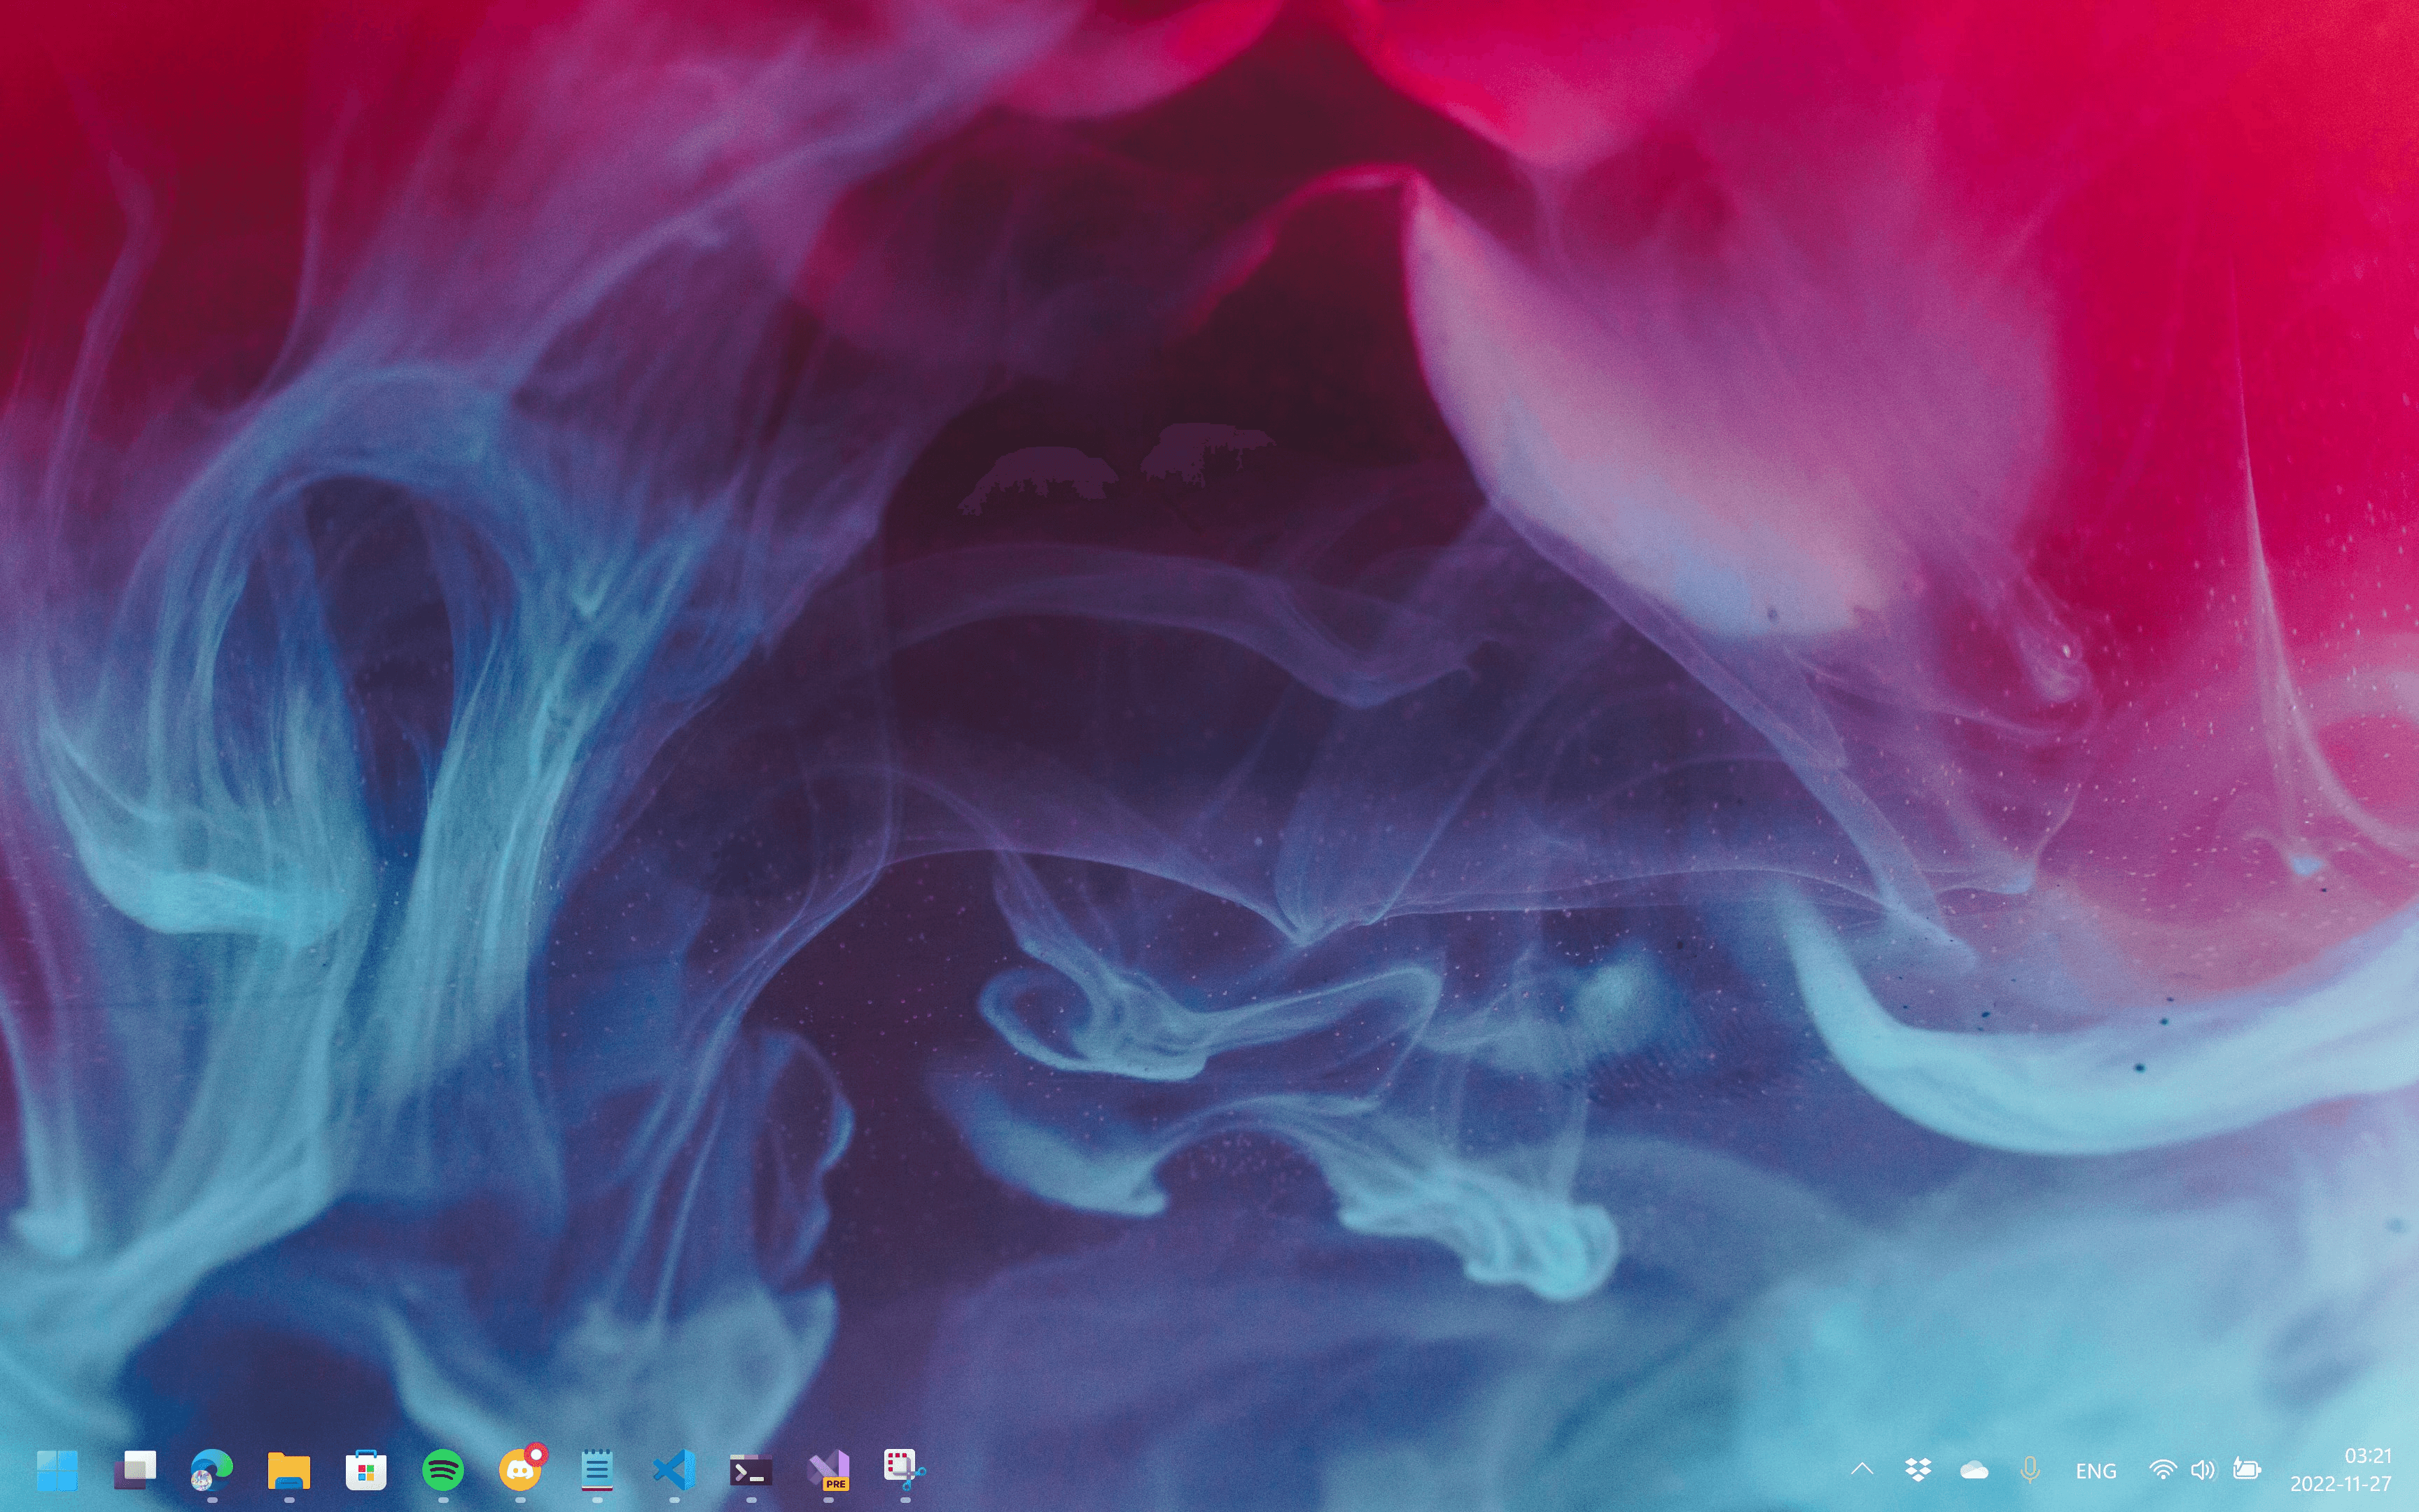
Choose a reasonably optimized wallpaper, check its resolution and avoid filling several monitors with demanding scenes if you care more about efficiency than animation. A subtle loop often looks better on a daily desktop than a wallpaper with constant movement, loud effects and several layers reacting to the cursor. This is my background on wallpaper engine. It is not free, and is priced at $5

Windhawk
Windhawk takes a different approach. It provides a platform for installing individual community-created mods that change how parts of Windows look or behave. Depending on the mod, you can adjust the taskbar, Start menu, File Explorer, window borders and other interface details without installing a complete custom version of Windows.
That flexibility also means you should pay attention to the page for each mod. Check which Windows versions it supports, read known limitations and avoid stacking several mods that target the same process. Windows updates can change Explorer or the taskbar, which may temporarily break a modification that previously worked.
Start with one small, well-documented mod and make sure Windows remains stable before adding another. Windhawk makes experimentation easier, but “community-created” still means the quality and compatibility can vary from one mod to the next.
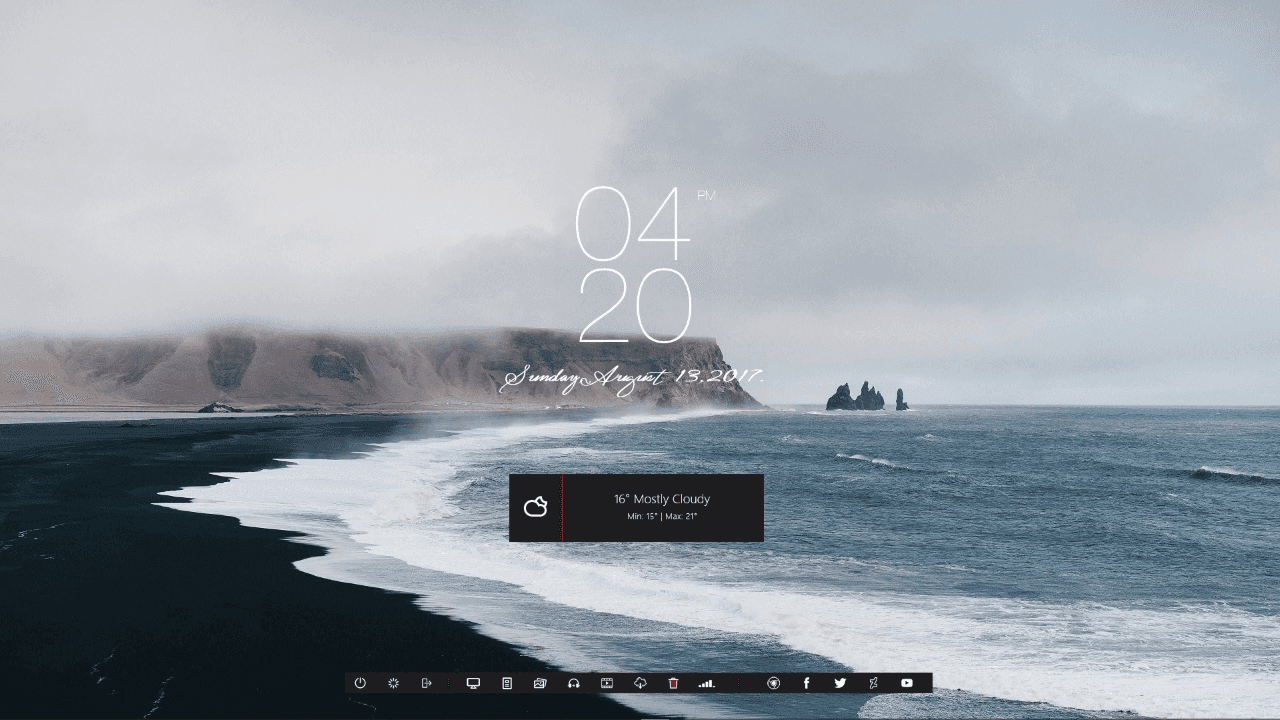
Rainmeter
Rainmeter is designed around desktop skins. These can display clocks, calendars, audio controls, system information, shortcuts and other widgets directly on the desktop. It is a good fit when you want a layout that looks intentionally designed rather than a collection of normal Windows shortcuts.
The program itself is only the base. Most of the visual style comes from the skins you choose and how you arrange them. A few matching widgets can make a desktop look polished, while covering every corner with meters tends to create clutter and duplicates information already available elsewhere.
Download skins from sources you trust, remove the ones you no longer use and watch for widgets that constantly poll hardware or online services. Resource use will depend more on the skins than on the idea of Rainmeter itself. If a desktop widget is using more processing power than expected, disable that skin rather than assuming the whole PC has developed a problem.
These four tools can work together when each has a clear role: TranslucentTB for the taskbar, Wallpaper Engine for the background, Windhawk for carefully chosen interface changes and Rainmeter for desktop information. You may also find that one or two are enough. A setup usually looks cleaner when every effect has a purpose.
6. Use NZXT CAM to How what the PC is doing
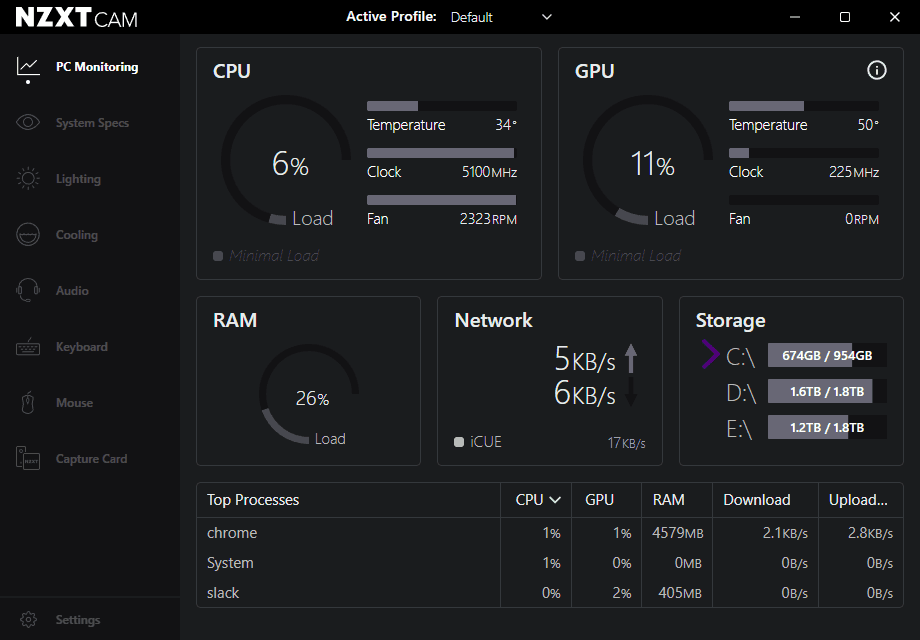
Once the basic setup is finished, it helps to have one place where you can check whether the PC is behaving normally. NZXT CAM provides real-time information about the CPU, GPU, memory and storage, including temperatures and utilization. Its compact Mini Mode can also keep a smaller set of readings visible without leaving the full application open on the desktop.
You do not need an NZXT case, cooler or motherboard to use the monitoring features. NZXT states that CAM works on any Windows PC without an account. Compatible NZXT hardware unlocks additional controls for products such as fans, RGB devices and Kraken LCD displays, but those controls are separate from the general PC-monitoring page.
For a new PC owner, CAM is most useful as a quick reference rather than something to stare at constantly. Open the monitoring page while the computer is idle and take a look at the CPU and GPU temperature, load and clock readings. Then play a demanding game for a while and check the numbers again. The goal is to learn what normal behavior looks like on your own system, which makes a real cooling or performance problem easier to recognize later.
Avoid treating one short temperature spike as proof that something is wrong. Modern processors and graphics cards adjust their clock speeds, voltage, power and fan behavior from moment to moment. Safe operating limits also differ between models, so a single universal “good temperature” does not work for every gaming PC. Sustained thermal throttling, repeated shutdowns, severe clock-speed drops or temperatures sitting at the component’s specified limit under an ordinary workload deserve more attention than a brief peak while a game is loading.
CAM may not show exactly the same load or temperature as Task Manager or another monitoring utility. NZXT explains that monitoring programs can use different sensors, reference points and sampling intervals. A small difference is therefore not automatically an error. If one reading appears wildly incorrect, make sure CAM has selected the dedicated graphics card as the primary GPU and check that the graphics driver is current.
Whether CAM should open automatically with Windows depends on how you use it. If it only serves as an occasional temperature checker, you can leave it disabled at startup and open it when needed. If CAM controls a compatible NZXT fan controller, cooler, lighting device or LCD screen, allowing it to start with Windows may be necessary for those profiles and controls to load correctly. Enabling Start NZXT CAM minimized keeps it available without placing the full window in front of you after every login.
There is little benefit in running several monitoring applications all day just to compare their numbers. Pick one tool that presents the information you need, learn its readings and close any overlays you do not use. Monitoring should help you understand the PC, not turn every normal fluctuation into a new problem to solve.
New gaming PC setup checklist
Before filling the drive with games, use this checklist to confirm that the important settings are in place:
The GPU shown in Device Manager matches the graphics card you bought.
The current driver came from NVIDIA, AMD or Intel’s official website.
XMP or EXPO is enabled if the PC and memory kit support it.
Task Manager reports the intended effective memory speed.
Windows is using the monitor’s native resolution and highest appropriate refresh rate.
The monitor cable is connected to the dedicated graphics card on a gaming desktop.
Unnecessary launchers and background apps no longer open automatically.
Security, audio, accessibility and hardware-control services you need remain enabled.
Customization apps were installed from their official sources and added one at a time.
Wallpaper Engine pauses or stops when a full-screen game is running if you want to minimize resource use.
NZXT CAM recognizes the correct CPU and GPU and can display their temperatures and utilization.
CAM starts with Windows only if you want constant monitoring or need it to control compatible NZXT hardware.
Which settings should you change first?
Start with the GPU driver, memory profile and monitor refresh rate. These are the settings most closely connected to hardware performance and to features you may already have paid for. A new graphics card deserves the correct driver, fast memory should not remain on a slow fallback profile without a reason, and a high-refresh-rate monitor should not spend its life pretending to be a 60Hz office display.
Startup cleanup comes next because it keeps Windows manageable as more software is installed. NZXT CAM can then give you a useful baseline for temperatures and system load. TranslucentTB, Wallpaper Engine, Windhawk and Rainmeter are the finishing touches, not requirements. Use them if they make the PC more enjoyable, and skip them if you prefer a simple desktop with fewer background processes.
The best new gaming PC setup is not the one with the most utilities installed. It is the one where the important hardware is configured correctly, Windows starts without unnecessary clutter, and every extra program has a reason to be there.
Frequently asked questions
Will these settings increase gaming FPS?
Installing the correct GPU driver and enabling a stable XMP or EXPO profile can improve performance in situations where the old driver or default memory settings were limiting the system. Results depend on the hardware and game. Changing the monitor refresh rate does not increase the FPS produced by the GPU; it changes how many frames the display can show each second.
Does every gaming PC support XMP or EXPO?
No. Support depends on the processor, motherboard, BIOS and memory kit. Some laptops and prebuilt desktops hide or lock memory-profile settings. Do not force a profile if the PC becomes unstable.
Should NZXT CAM always run at startup?
Not necessarily. You can open CAM manually when you want to check temperatures. It is more useful at startup when it controls compatible NZXT fans, lighting, cooling profiles or an LCD display.
Can I follow these steps on a prebuilt gaming PC?
Most of them apply to prebuilts as well as custom PCs. The main differences are that some prebuilt BIOS menus are restricted, the manufacturer may provide its own driver or control software, and the installed memory may not include an XMP or EXPO profile.
Popular Posts
tech Reviews
GOverlay Plus 7.8-Inch Review: The Little Screen That Brought My Gaming Setup Together
Tech Reviews
UNIHIKER K10 Review: The $28.90 AI Board That Can Become Almost Anything
Gaming
What We Know About the Guy Behind the GTA 6 Leak: CyberLeek
Home Servers
ZimaBlade Review: Is This Tiny Home Server Worth It?
Keep reading


